


Relying entirely on cloud-based automation tools means your workflows, credentials, and data sit on someone else’s servers. For many teams, that’s a growing concern. Self-hosting solves this by putting your automation environment under your direct control, secure, customizable, and free from third-party limits.
In this guide, you’ll learn how to install and run n8n on your own infrastructure using either Docker or a direct setup. By the end, you’ll have a self-hosted automation system that’s private, scalable, and fully yours to manage.
What is n8n?
n8n is an open-source automation platform that lets you design and manage workflows connecting multiple applications, APIs, and databases. It utilises a node-based interface, where each node performs a specific task, ranging from sending HTTP requests to transforming data or triggering external services.
Unlike proprietary tools such as Zapier or Make, n8n can be fully self-hosted, allowing you to control execution, data handling, and infrastructure. It supports over 400 integrations and also lets you build custom nodes or scripts in JavaScript, making it flexible enough for developers and teams with advanced automation needs.
Because it’s open source, n8n continues to evolve through community-driven contributions, offering transparency, scalability, and independence from vendor restrictions.
Why choose self-hosting?
Running n8n on your own infrastructure gives you complete control over your automation environment, from where your data is stored to how your workflows are executed. This control brings several key advantages.
Data privacy and ownership
All credentials, logs, and workflow data stay within your infrastructure. Nothing is sent to external servers, which reduces exposure to third-party risks and ensures compliance with internal or regulatory policies.
Customisation and flexibility
Self-hosting allows you to modify configuration files, environment variables, and integrations to match your setup precisely. You can extend functionality with custom nodes, adjust permissions, or integrate internal APIs that cloud services typically restrict.
Cost management
Instead of paying per workflow or execution limit, you only maintain the infrastructure you run. This makes scaling predictable, especially for teams automating large volumes of data or internal systems.
Performance and scalability
You can allocate resources according to workload, deploy multiple worker instances, and use reverse proxies or load balancers to handle enterprise-scale automation.
While self-hosting requires some initial setup and maintenance, it provides a secure, adaptable foundation for long-term workflow automation.
Before you start: What you’ll need
Before setting up n8n on your own server, make sure your environment meets the following technical and system requirements.
Technical familiarity
You should be comfortable using the command line and have a basic understanding of Docker or Node.js environments. Knowledge of ports, environment variables, and reverse proxies (such as Nginx or Traefik) will be helpful when deploying to production.
System resources
For small to medium workflows, a server or VM with at least 2 CPU cores, 2 GB of RAM, and 10 GB of storage is sufficient. Larger or concurrent workflows benefit from 4 or more cores and 8 GB of RAM. Linux (Ubuntu or Debian) is recommended for stability and community support.
Software dependencies
You can install n8n using either Docker or Node.js.
⇒ Docker (v24 or later) simplifies setup and isolation.
⇒ js (v20 LTS or newer) and npm are required for direct installations.
⇒ For persistent storage, use a database such as PostgreSQL or MySQL; SQLite is also supported for lightweight or testing environments.
Optional components
For production deployments, configure SSL using Let’s Encrypt and run n8n behind a reverse proxy to manage HTTPS traffic securely.
Set up n8n with Docker Desktop (local, GUI)
Using Docker Desktop is the simplest way to run n8n locally. It provides isolation and persistent storage without requiring the management of Node or system-level packages.
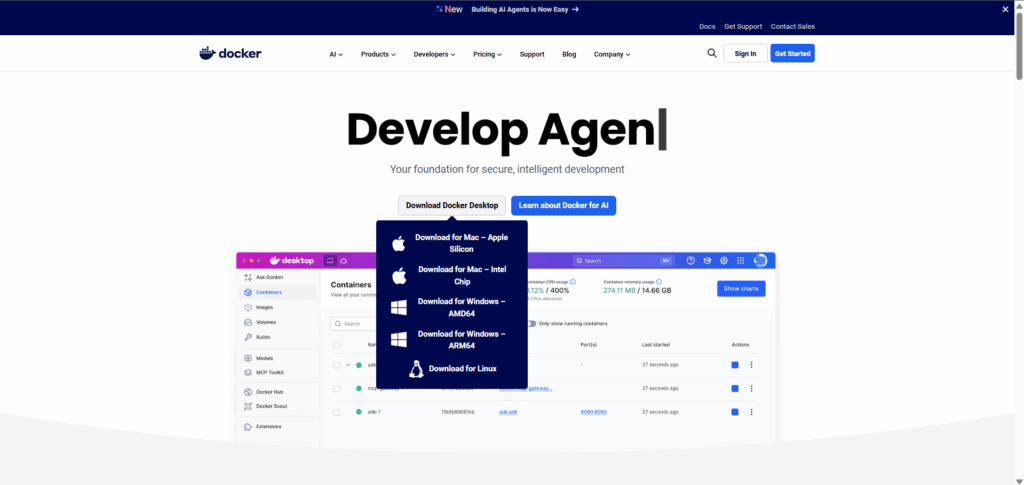
Step 1. Install Docker Desktop
⇒ Download Docker Desktop from the official Docker site and install the version for your OS.
⇒ On Windows, follow the installer prompts and enable WSL2 if recommended. Restart the system when prompted.
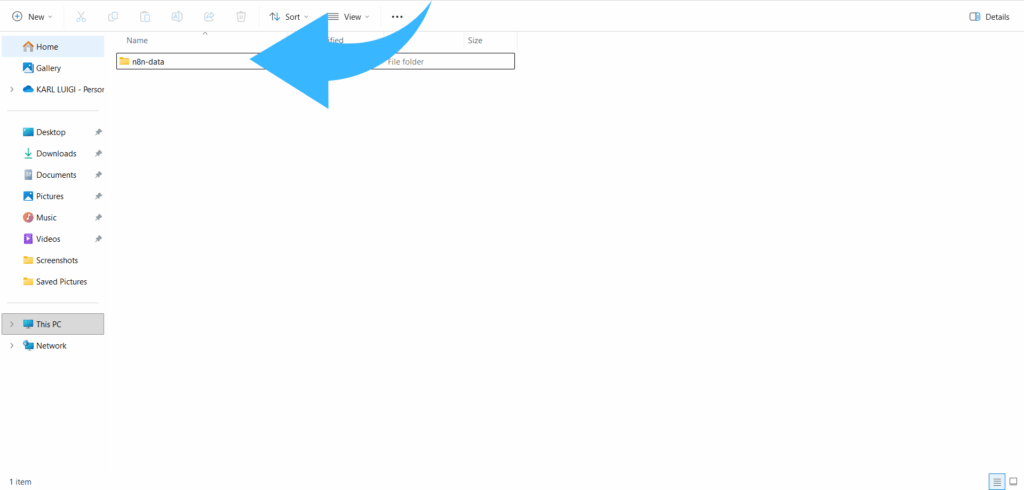
Step 2. Create a data folder for persistence
Create a folder on your machine to store workflows, credentials, and logs. Examples:
- macOS / Linux: ~/n8n-data
- Windows: C:\n8n-data
This folder will be mapped into the container so your data survives container restarts and image updates.
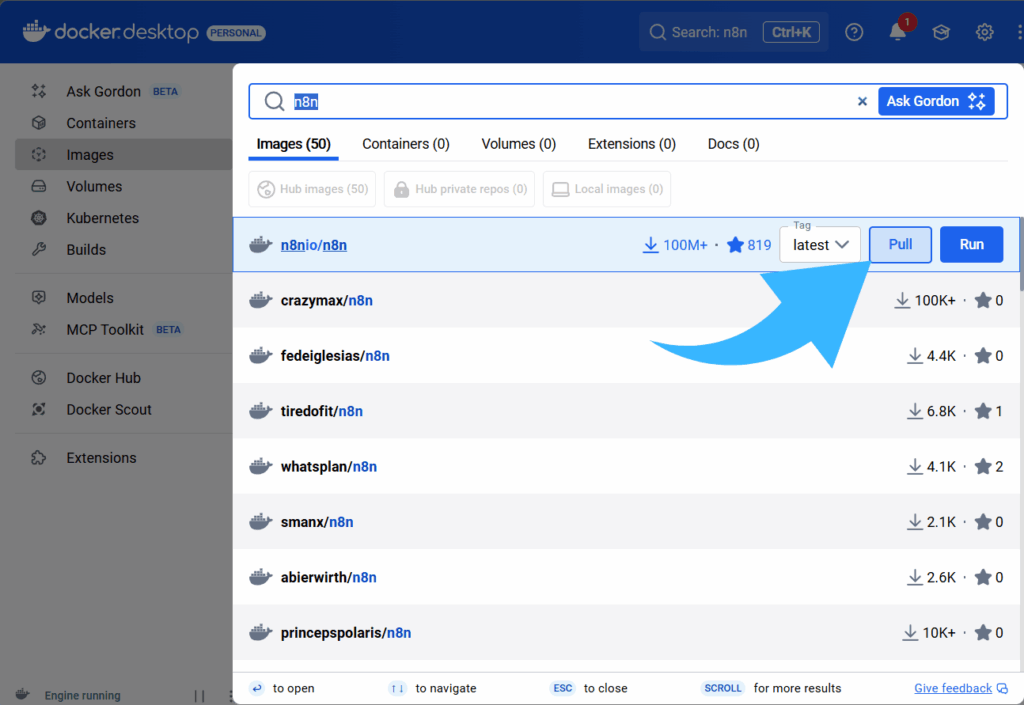
Step 3. Pull the official n8n image
Open Docker Desktop, go to Images, search for n8nio/n8n, and click Pull to download the official image.
4. Create and configure the container (GUI)
Open Containers / Apps (or Containers), then create a new container from the n8nio/n8n image and configure these settings:
⇒ Name: n8n (or any name you prefer).
⇒ Ports: map host 5678 to container 5678 so the editor is available at http://localhost:5678.
⇒ Volumes: add a bind mount from your host data folder to /home/node/.n8n inside the container. This preserves workflows and credentials.
⇒ Restart policy: set to Always or Unless stopped to ensure persistence across reboots.
⇒ Environment variables: for local testing, you can leave these blank. For production behind a domain, you will want to set host and auth variables in Docker Desktop’s Environment section (for example, configure your reverse proxy, enable HTTPS, and/or enable basic auth).
Click Run to start the container.

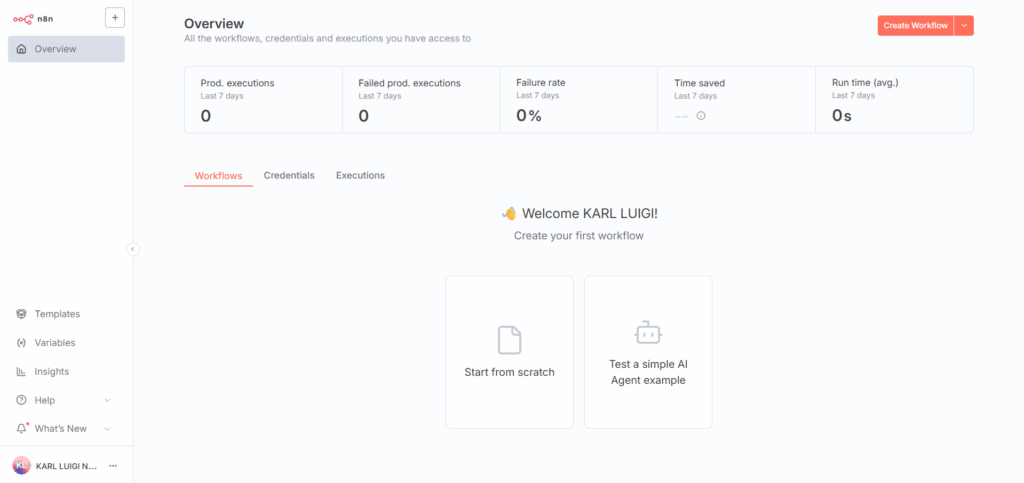
Step 5. Open and Run the Editor
In a browser, navigate to http://localhost:5678. Complete the onboarding to create your owner account and begin building workflows.
⇒ Stop / Start / Restart: Use the container controls in Docker Desktop.
⇒ View logs: open the Logs tab for the running container.
⇒ Remove: if you delete the container, your workflow data remains in the host folder you mapped. Recreate the container and remap the same folder to restore state.
Updating n8n
To update via Docker Desktop:
- Stop and remove the existing n8n container.
- Pull the latest n8nio/n8n image from Images.
- Create a new container from that image, using the same port and volume mappings.
Quick security notes
⇒ For local experiments, the default setup is fine. For any machine exposed to the internet, secure access with HTTPS (using a reverse proxy such as Nginx or Traefik) and enable authentication.
⇒ Keep the host data folder backed up regularly.
Set Up n8n Without Docker (Direct Installation)
If you prefer full control over your environment or want a lightweight setup, you can install n8n directly on a local machine or VPS. This approach is ideal for advanced users who want flexibility beyond containerised setups.
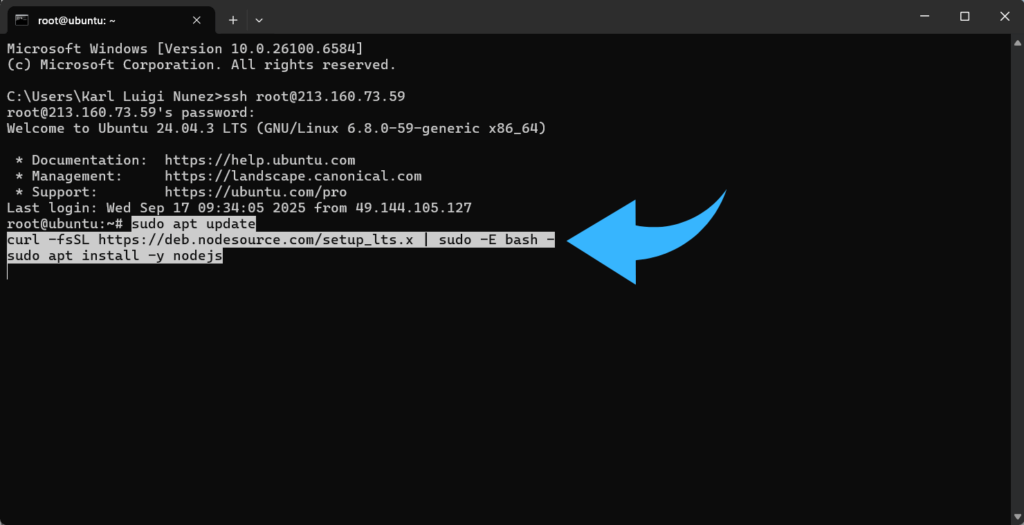
Step 1: Prepare Your Server Environment
Before installing n8n, make sure your system is up to date and ready to run Node.js. Run the following commands:
sudo apt update
curl -fsSL https://deb.nodesource.com/setup_lts.x | sudo -E bash –
sudo apt install -y nodejs
Once the installation completes, verify that both Node.js and npm are available:
node -v
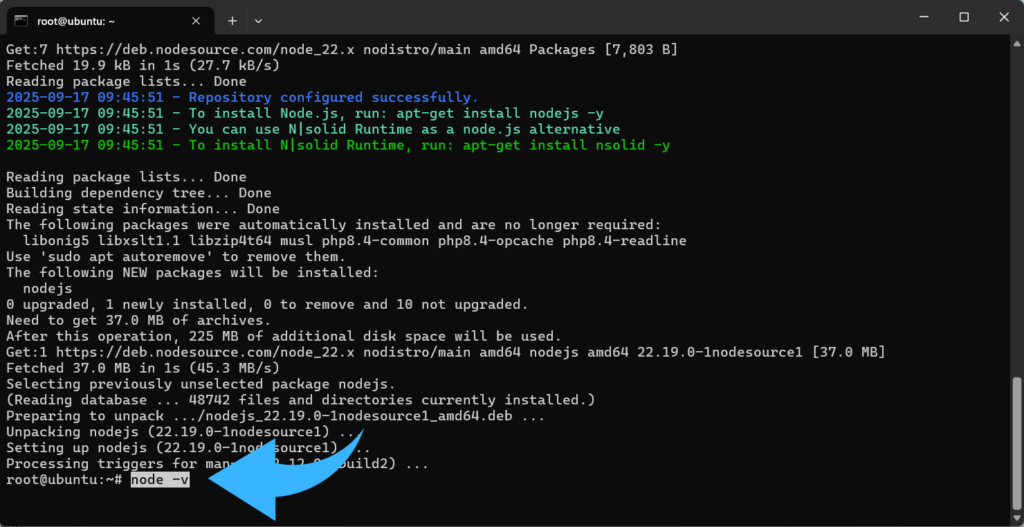
npm -v
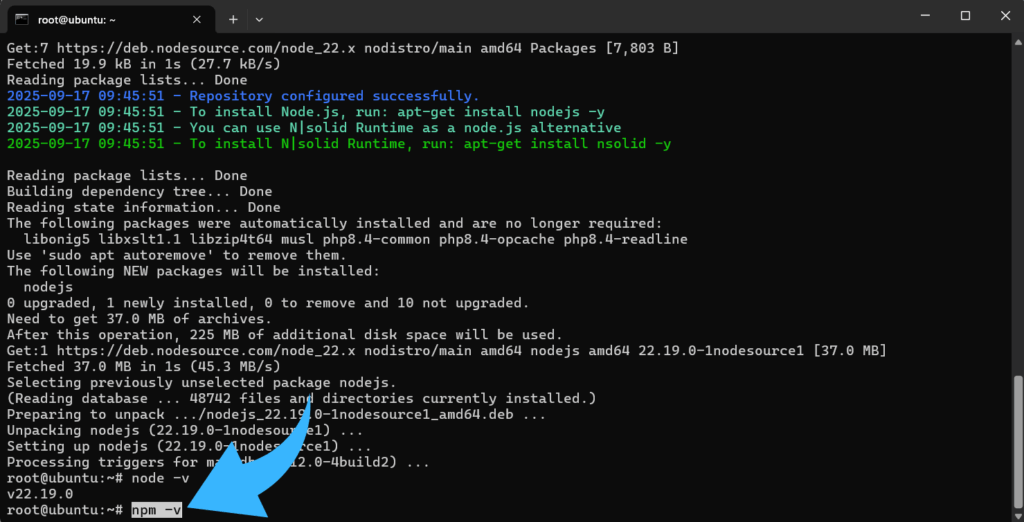
It’s recommended to use an LTS version of Node.js (such as 20.x) for better stability and long-term support.
Step 2: Install n8n Using npm
Next, install n8n globally using npm so it can be accessed from any directory:
npm install n8n -g
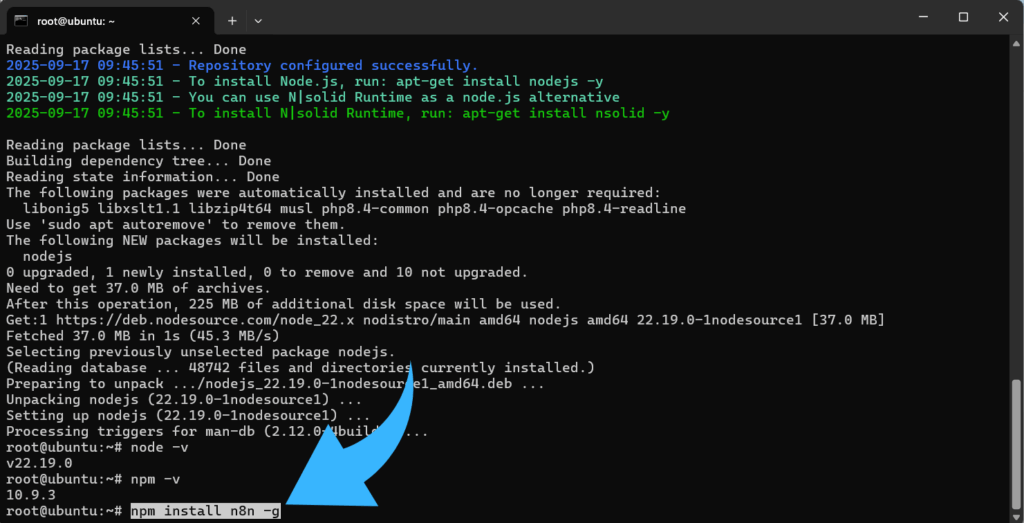
This downloads and installs the latest version of n8n and its dependencies.
Step 3: Start the n8n Editor
Once installed, you can launch the n8n editor directly:
N8n

By default, n8n runs on port 5678.
Open your browser and visit http://localhost:5678 to access the visual editor and complete the onboarding setup.
Step 4: Keep n8n Running Continuously
To ensure n8n runs reliably after a reboot or crash, use a process manager such as PM2 or systemd.
For example, with PM2:
npm install pm2 -g
pm2 start n8n
pm2 startup
pm2 save
This setup ensures that n8n automatically restarts whenever your system reboots, keeping workflows active without manual intervention.
Step 5: Secure and Configure Your Installation
For external access or production environments, take steps to secure n8n:
⇒ Enable HTTPS: Run n8n behind a reverse proxy (e.g., Nginx or Caddy) with an SSL certificate.
⇒ Set environment variables: Configure authentication, webhook URLs, and database connections through .env or your system’s environment.
⇒ Use a persistent database: For larger setups, connect n8n to PostgreSQL or MySQL instead of using the default SQLite database.
These measures protect your workflows, ensure reliability, and provide flexibility for future scaling.
Secure n8n with Authentication and Network Protections
Securing your self-hosted n8n instance is critical because it handles sensitive workflows, credentials, and API keys. Enable basic authentication or integrate with an identity provider using OAuth to restrict access to authorized users. For instance, exposed externally, run n8n behind a reverse proxy (such as Nginx, Traefik, or Caddy) with SSL/TLS to encrypt all traffic. Limit access to the workflow editor by configuring firewall rules or network security groups, and regularly update both your n8n instance and the underlying server to reduce vulnerabilities. Monitoring access logs and maintaining backups of workflow data and credentials further enhances security, ensuring you can recover quickly from potential issues.
Scaling n8n and Optimizing Workflow Performance
To ensure n8n runs efficiently as your automation grows, consider several performance-focused strategies. Using Redis for workflow queuing helps manage concurrent tasks, offloading jobs from the main process and improving responsiveness. For high-throughput workflows, running multiple worker nodes allows tasks to be processed in parallel, enhancing throughput without overloading a single instance. Monitoring system metrics is equally important: track CPU and memory usage, workflow execution times, queue lengths, and error rates. Setting up alerts through tools like Prometheus, Grafana, or cloud monitoring services ensures you can quickly respond to potential issues. Combining these approaches provides a scalable, reliable self-hosted n8n environment capable of handling complex or large-scale automation.
Backup and Maintenance Strategies
Maintaining a reliable n8n instance requires regular backups and proactive system care. Ensure that all workflows, credentials, and database data are backed up frequently. Consider automating this process with scripts, cron jobs, or scheduled tasks to reduce manual effort. Routine maintenance is equally important: keep n8n and its dependencies up to date, monitor logs for errors or failed workflows, and verify that storage and server resources remain sufficient. Implementing these practices helps prevent data loss, maintains workflow stability, and ensures your self-hosted automation environment remains resilient as usage grows.
Troubleshooting Common Issues
When running a self-hosted n8n instance, common problems can often be addressed using targeted strategies:
⇒ API and integration connectivity: Check network access, firewall rules, and authentication credentials to ensure external services can communicate with n8n.
⇒ Performance bottlenecks: High concurrency or resource-intensive workflows can slow execution. Consider adding worker nodes, optimizing workflow logic, and monitoring system metrics to identify and alleviate bottlenecks.
⇒ Workflow execution errors: Use n8n’s built-in execution logs and history to debug failed nodes, inspect input/output data, and adjust workflow configurations accordingly.
⇒ Server and environment issues: Ensure Node.js, dependencies, and any connected databases are up to date, and check server logs for errors that may affect n8n’s stability.
Conclusion
Self-hosting n8n provides full control over workflow automation, enabling secure data management, customizable integrations, and scalable execution. Whether deployed using Docker or a direct installation, a self-hosted n8n instance allows teams and developers to streamline processes while maintaining flexibility and reliability. Proper configuration, monitoring, and maintenance ensure that the platform remains stable and performant as automation needs grow.