


Adding schema markup in WordPress can help search engines better understand your website and improve how your content appears in search results. Proper implementation can increase your chances of appearing in rich snippets, enhancing visibility and click-through rates. In this article, we cover practical ways to add schema to your WordPress site, including using plugins, customizing with JSON‑LD, and optimizing for different content types, so you can make your website more search engine-friendly and more effective for your audience.
Understanding Schema Markup
Schema markup is a structured data format that provides search engines with context about the content on your website. By adding it, you’re essentially telling search engines what your pages, posts, or products are about, which can improve how your site appears in search results.
For example:
⇒ A blog post with schema markup can appear as a rich snippet, including a headline, author, publication date, and a featured image.
⇒ Local businesses can display their address, hours, and contact information directly in search results.
⇒ Product pages or FAQs can highlight ratings, availability, and step-by-step instructions.
For WordPress sites, it is a key part of SEO. Traditional SEO focuses on keywords and user experience, but it also helps search engines understand the specific details of your content. This extra clarity can improve visibility, click-through rates, and credibility in search results.
Key Schema Types for WordPress Sites
Before implementing a schema, it’s important to choose the correct type for your content. There are five main schema types commonly used for different pages and content in WordPress: Article, Organization, Local Business, Product and Review, and FAQ/How-To.:
Article Schema is ideal for blog posts. It allows search engines to display the author, headline, and publication date. In WordPress, it can be added via SEO plugins or custom JSON‑LD for better content indexing.
Organization Schema represents your business or website and provides Google with structured details about your brand. It’s useful for WordPress sites to establish credibility and improve brand recognition in search results.
Local Business Schema includes essential business information such as address, phone number, and hours of operation. This is key for WordPress sites targeting local SEO.
Product and Review Schema enhances product pages by showing ratings, prices, and availability. WordPress e-commerce plugins often support this type for automatic integration.
FAQ and How-To Schema highlights common questions or step-by-step instructions in search results. WordPress plugins can make it easy to mark up FAQs or guides without coding.
There are many other schema types you might use depending on your content. Besides the most common ones we covered above, you’ll also find types like:
- Event Schema: For webinars, concerts, or local events.
- Recipe Schema: Great for food blogs or cooking sites.
- Video/Movie Schema: Helps video content stand out in search results with thumbnails and details.
- JobPosting Schema: For recruitment pages.
- Course Schema: For educational content or online classes.
These extra types aren’t used on every site, but knowing they exist helps you choose the structured data that will have the most impact. The key is to pick the right schema type for each page so search engines understand it clearly and your content appears exactly as you want in search results.
How to Add Schema Markup Using a WordPress Plugin
Step 1: Choose a Suitable Plugin
Select a plugin that supports multiple schema types. Popular options include Yoast SEO and Rank Math.
Step 2: Install and Activate the Plugin
- Log in to your WordPress dashboard.
- Navigate to Plugins > Add New.
- Search for your chosen plugin.
- Click Install Now and then Activate.
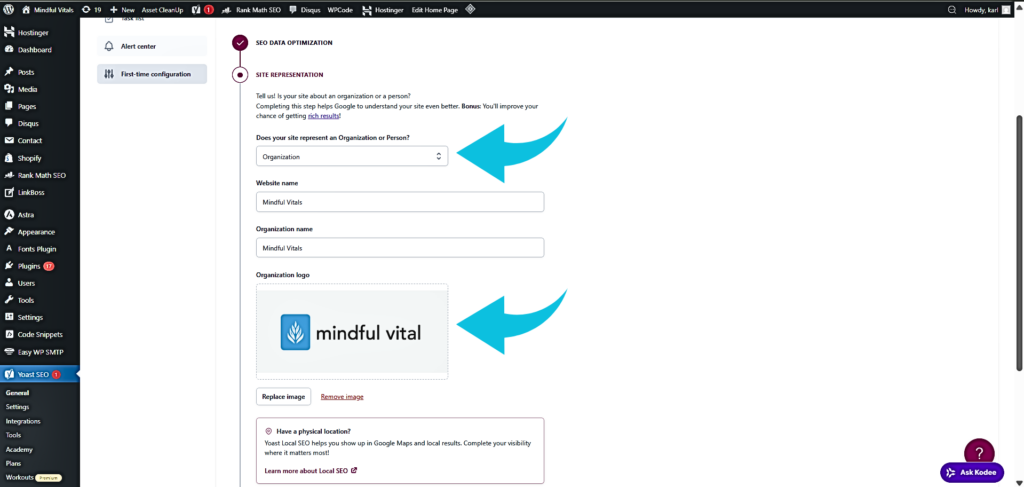
Step 3: Configure Global Schema Settings
Once activated, most plugins allow you to set global defaults:
- Go to the plugin settings in your WordPress dashboard.
- Set your website as an Organization, upload a logo, and configure default schema types for posts, pages, or products.
- Adjust any additional settings, such as default author or review details.
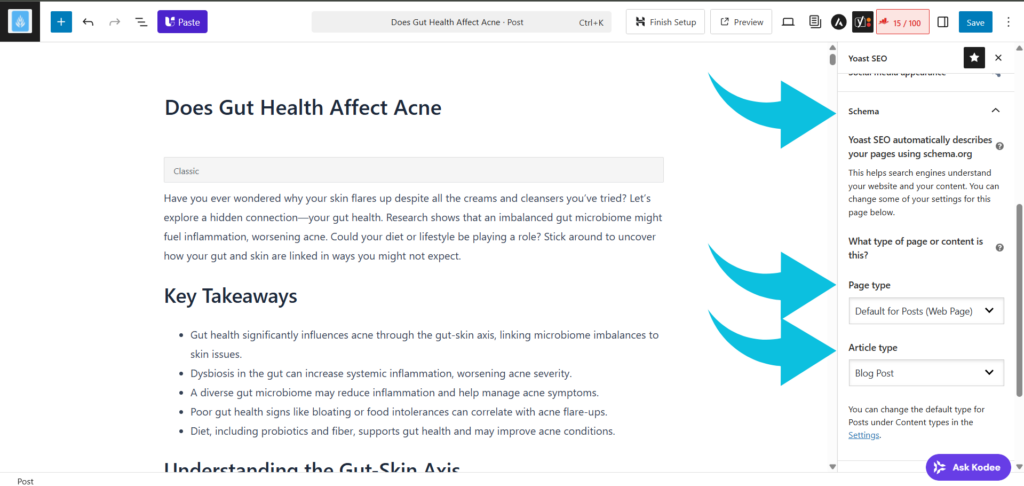
Step 4: Apply Schema to Posts and Pages
Plugins typically allow you to assign a schema to individual posts or pages:
- Edit the post or page in WordPress.
- Scroll to the plugin’s schema section.
- Choose the type (e.g., Article, FAQ, How-To).
- Fill in any required fields, such as author, rating, or publication date.
- Save your changes.
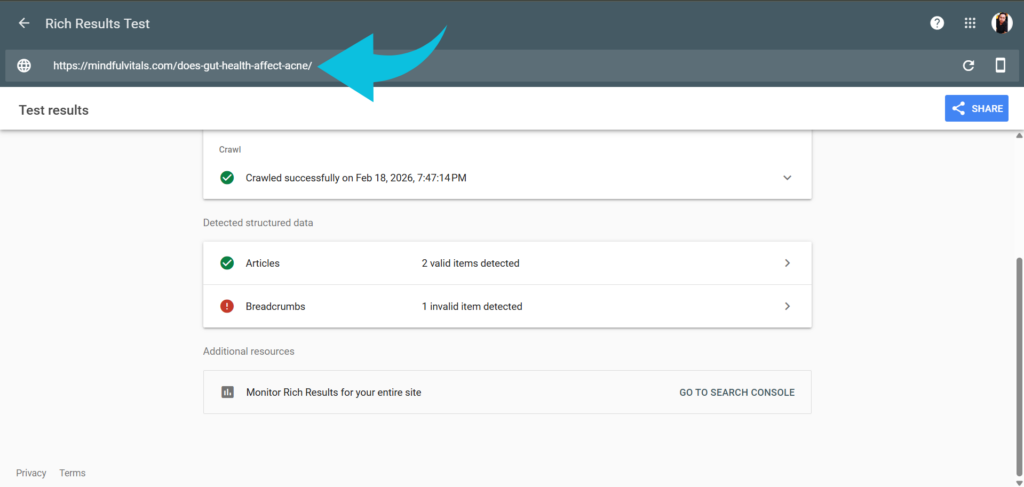
Step 5: Test Using Google Rich Results Test
After adding the schema, validate it to ensure search engines can read it:
- Go to the Google Rich Results Test or Schema Markup Validator
- Enter the URL of your post or page and click Test URL.
- Review results for errors or warnings, and fix any issues flagged by the tool.
Adding Schema Markup Manually with JSON‑LD
For advanced users, manually adding JSON‑LD schema provides full control over structured data implementation.
Step 1: Identify the Schema Type for Your Content
Decide which schema type matches your content.
Choosing the right type ensures accurate representation for search engines.
Step 2: Write the JSON‑LD Code Snippet
Create the JSON‑LD snippet using proper syntax. For example, a simple Article Schema looks like:
function mv_add_article_schema_smoking_fasting() {
// Csak a konkrét bejegyzés URL-jén futtatható
if ( ! is_singular() ) {
return;
}
$target_url = »https://mindfulvitals.com/does-smoking-break-intermittent-fasting/«;
// Hasonlítsa össze a jelenlegi URL-t a cél URL-lel
if ( trailingslashit( get_permalink() ) !== trailingslashit( $target_url ) ) {
return;
}
?>
<script type=”application/ld+json”>
{
„@context”: „https://schema.org”,
„@type”: „Article”,
„mainEntityOfPage”: {
„@type”: »WebPage«,
„@id”: „https://mindfulvitals.com/does-smoking-break-intermittent-fasting/”
},
„headline”: „Does Smoking Break Intermittent Fasting”,
»description«: „REPLACE_WITH_SHORT_DESCRIPTION_OF_THE_ARTICLE”,
„image”: [
„https://mindfulvitals.com/wp-content/uploads/2025/07/smoking_s_health_risks_outweigh_benefits_v5p8n.jpg”
],
„author”: {
„@type”: „Person”,
»name«: „REPLACE_WITH_AUTHOR_NAME”
},
„datePublished”: „2025-07-21”,
„dateModified”: „2025-07-21”,
»publisher«: {
„@type”: „Organization”,
„name”: „REPLACE_WITH_PUBLISHER_OR_SITE_NAME”,
„logo”: {
„@type”: „ImageObject”,
»url«: „REPLACE_WITH_PUBLISHER_LOGO_URL”
}
}
}
</script>
<?php
}
add_action( »wp_head«, »mv_add_article_schema_smoking_fasting« );
Step 3: Insert JSON‑LD Directly into Your Theme’s Header.php
For full control, you can add your JSON‑LD snippet straight into your theme’s header.php just before the closing </head> tag. This ensures the structured data loads on every page that uses the header.
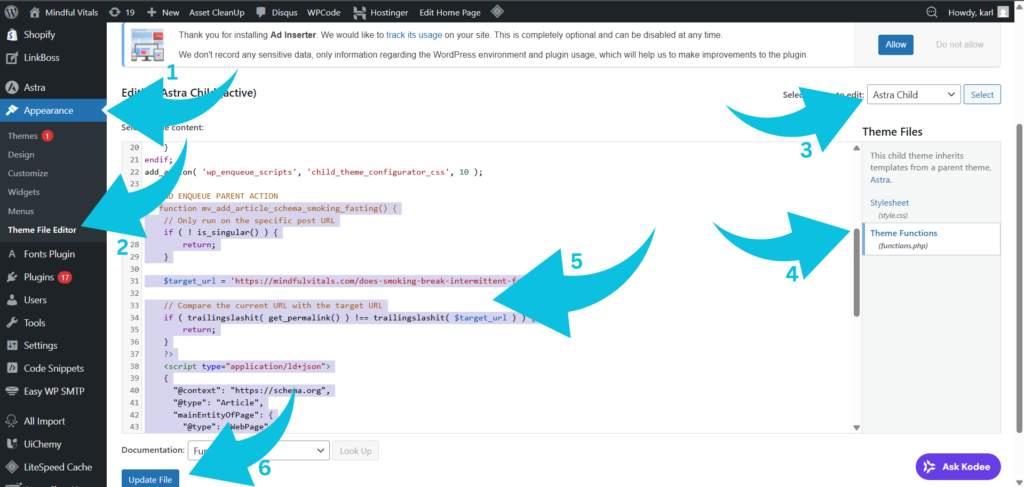
Note: If you’re using a theme like Astra with a child theme that doesn’t include a header.php file, don’t create one from scratch. Instead, you can add your JSON‑LD snippet via the child theme’s functions.php using the wp_head hook. This achieves the same effect safely and keeps your site update-proof.
- Use a Child Theme: Always use a child theme to prevent updates from overwriting your changes.
- Locate the Header File: Open your child theme’s php (if it exists) via Appearance > Theme Editor.
- Paste JSON‑LD Before </head>: Insert the snippet and save.
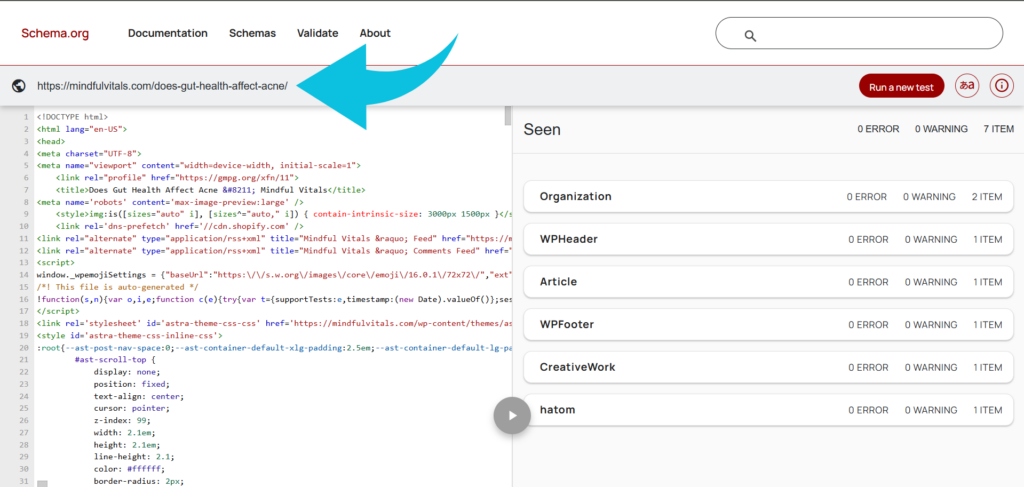
Step 4: Validate Your Schema
Check that your JSON‑LD is correctly implemented:
- Use Google’s Rich Results Test or Schema Markup Validator.
- Input your page URL or paste the code directly.
- Fix any errors flagged by the tool.
Best Practices and Common Mistakes to Avoid
Avoid Duplicate Schema
Adding the same schema across multiple pages can confuse search engines and reduce effectiveness. In WordPress, ensure each page or post has unique structured data relevant to its content.
Match Schema to Content Type
Always select the schema type that fits the content. For example, use Product for product pages and FAQ Schema for instructional content. Using the wrong type can prevent rich snippets from appearing.
Maintain Clean JSON‑LD
Incorrect or outdated JSON‑LD syntax can cause errors. Regularly check your code, especially after plugin updates, and validate using tools like Google’s Rich Results Test.
Monitor Schema in Google Search Console
Set up alerts and review reports in Search Console to catch errors early. WordPress users can also use SEO plugins that integrate schema monitoring to simplify this process.
Integrate Schema with On-Page SEO
Schema works best when paired with strong page titles, headings, and meta descriptions. Structured data enhances the signals search engines already get from well-optimized WordPress content.
Conclusion
Adding schema markup is one of the most effective ways to make your WordPress site stand out in search results. Start by selecting the appropriate type for your content, implement them accurately using plugins or JSON‑LD, and keep them up to date with regular checks. This not only improves SEO but also makes your site easier for users and search engines to navigate. Begin implementing schema today to enhance your visibility and get the most out of your WordPress content.