


Adding an Instagram feed to Elementor is a practical way to keep your website updated with fresh content. When implemented correctly, it keeps your website content up to date without manual updates.
Instead of relying on static visuals, your pages continuously reflect your latest Instagram activity. The process works best when approached step by step with a clear structure. This ensures your feed loads properly and stays consistent with your design.
Why Adding an Instagram Feed to
Elementor Matters
Adding an Instagram feed to Elementor does more than display social posts. It keeps your website visually active without constant manual updates. A live feed regularly introduces fresh content, which may have improved user engagement and time spent on your pages, especially when running on a well-optimized WordPress hosting setup.
It also reinforces brand consistency by aligning your website with your social media presence. Instead of duplicating content across platforms, your site becomes an extension of your Instagram activity. This approach helps maintain relevance while reducing the effort required to keep your site updated.
Step 1: Install an Instagram Feed Plugin
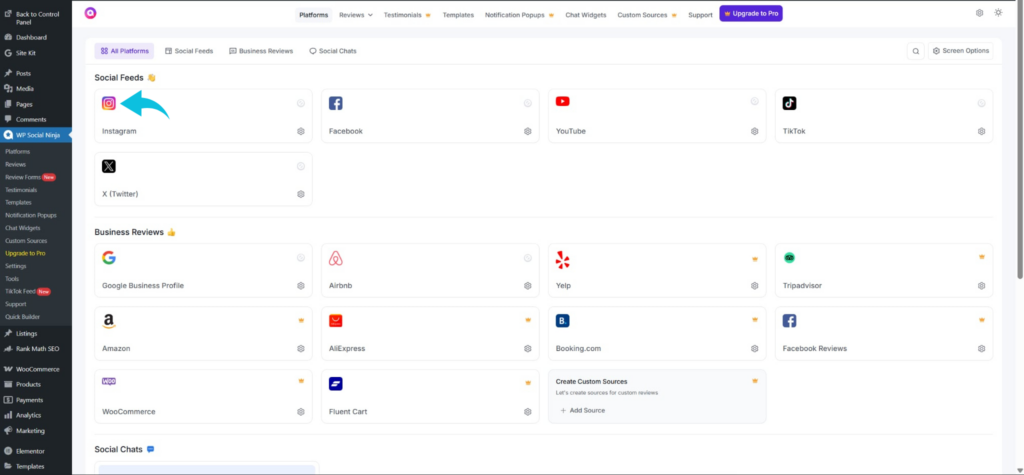
Elementor does not natively support Instagram feeds, so using a plugin is necessary. In your WordPress dashboard, go to Plugins → Add New and search for a plugin like WP Social Ninja. This plugin integrates smoothly with Elementor and provides reliable feed settings.
After installing, activate it to make it accessible in your dashboard. Setting this up correctly ensures you have a stable foundation for adding and managing your Instagram content.

Step 2: Connect Your Instagram Account
After activation, navigate to your plugin settings, select the Instagram platform, and connect your account.
Click Connect Account and complete the authorization process through Instagram. This allows the plugin to access and pull content from your profile.
Once connected, your account becomes the source your feed uses. Setting up the connection before creating the feed helps avoid configuration errors later.
Step 3: Create a New Instagram Feed
Once your account is connected, create a new Instagram feed. This is where you define what type of content you want to display on your site. Options typically include personal posts, hashtags (for Business accounts only), or tagged content, depending on your goal.
Selecting the right feed type influences how your site presents your brand or community. A clear setup at this stage ensures the feed pulls from the correct source and displays the right content.
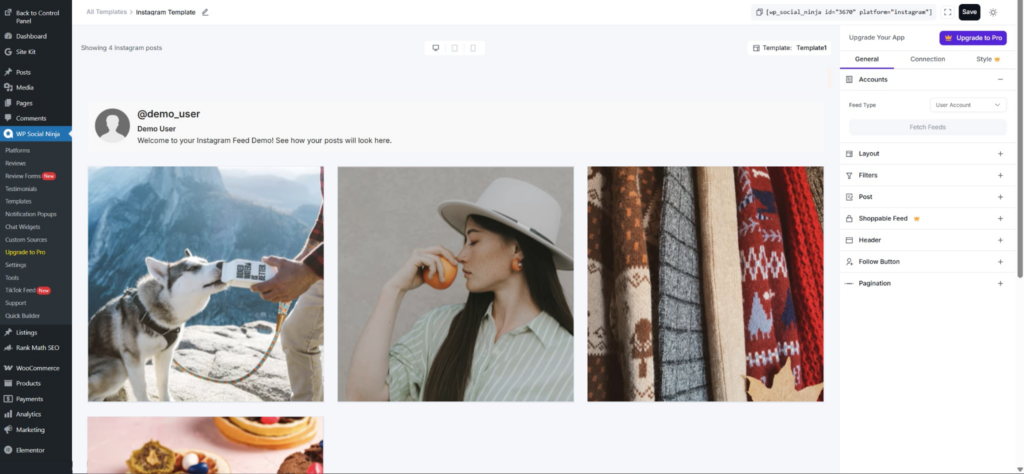
Step 4: Customize the Feed Settings
With your account connected, you can adjust how the feed appears on your site. The plugin lets you choose layouts like grid or carousel, depending on your preference. You can also control the number of posts, spacing, and alignment.

These settings affect both appearance and user interaction, helping you achieve a more personalized look that aligns with your website design. Using the preview feature helps you finalize a layout that fits your site design.
Step 5: Open the Page with Elementor
Go to Pages → Add New to create a new page or open an existing one where you want the Instagram feed to appear.
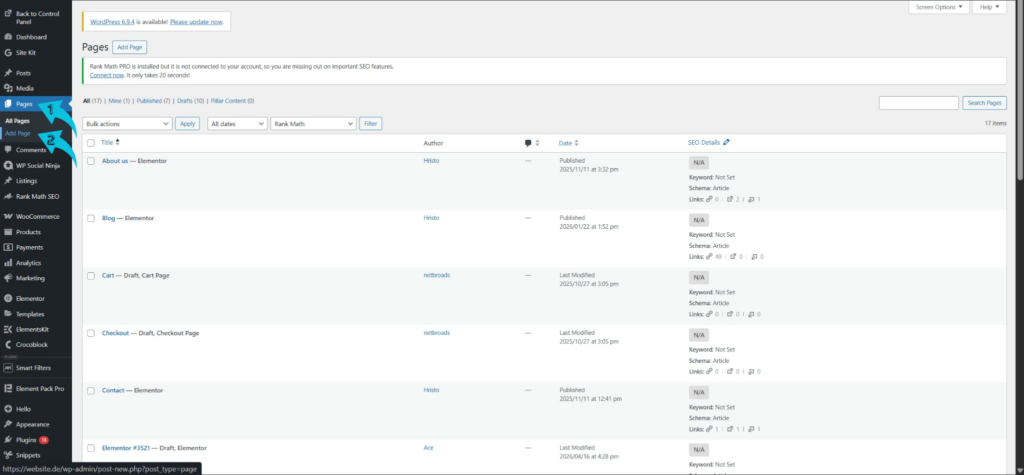
Click Edit with Elementor to open the visual builder. This allows you to control where and how the feed is displayed.
Place the feed in a dedicated section or sidebar to maintain visual balance. Choosing the right section improves visibility and overall page flow.
Step 6: Add the Instagram Feed Widget
Inside Elementor, locate the plugin widget. Drag and drop it into your chosen section on the page.
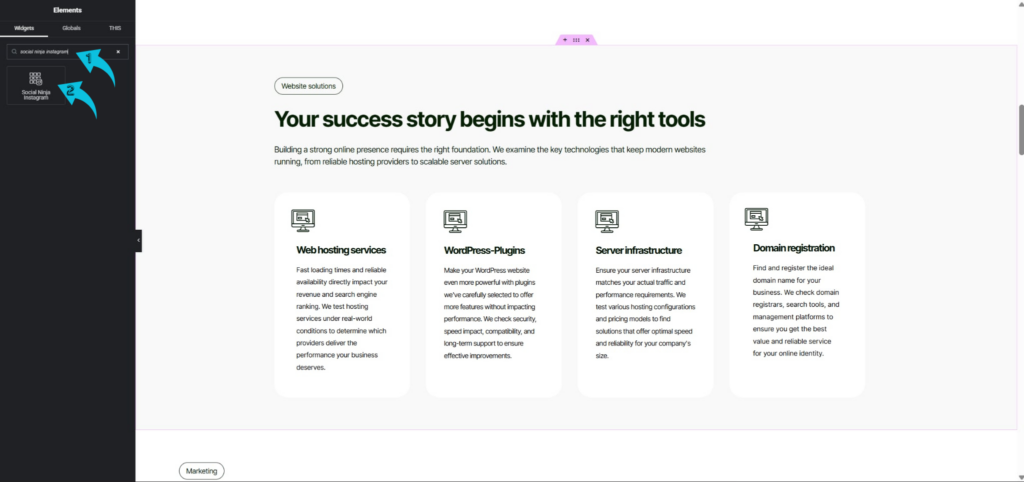
Then select the feed you created from the settings panel.
This links your configured feed to the front-end design. Once applied, your Instagram content should appear within the layout.
Step 7: Adjust Layout, Styling, and Publish the Page
After adding the feed, refine its placement using Elementor controls to match your page structure. Adjust margins, padding, and alignment so the feed blends naturally with other elements.
Check responsiveness to ensure it displays properly across desktop, tablet, and mobile views. Once satisfied, click Publish or Update to apply all your changes. Finally, review the live page to confirm the feed loads correctly and maintains a consistent layout across devices.
Conclusion
Adding an Instagram feed to Elementor gives you direct control over how your social content appears on your website. Instead of relying on a single setup, the process spans multiple stages to ensure your feed displays accurately and stays up to date. From installing plugins to connecting your account and placing the widget, each step contributes to a consistent and reliable result. When done properly, this approach keeps your content fresh and aligned with your site design.