

Contact Form
This guide will help you to to Customize Contact Form.
-
- Drag and Drop
openopen Dialog Box. Now in Dialog Box Clickonon Add New Fieldcheckcheck use reCAPTCHAsetupsetup reCAPTCHASetupSetup reCAPTCHA for Contact Form
- Drag and Drop
-
- Now
selectselect Alignmentandand Form Nameinin E-mail template.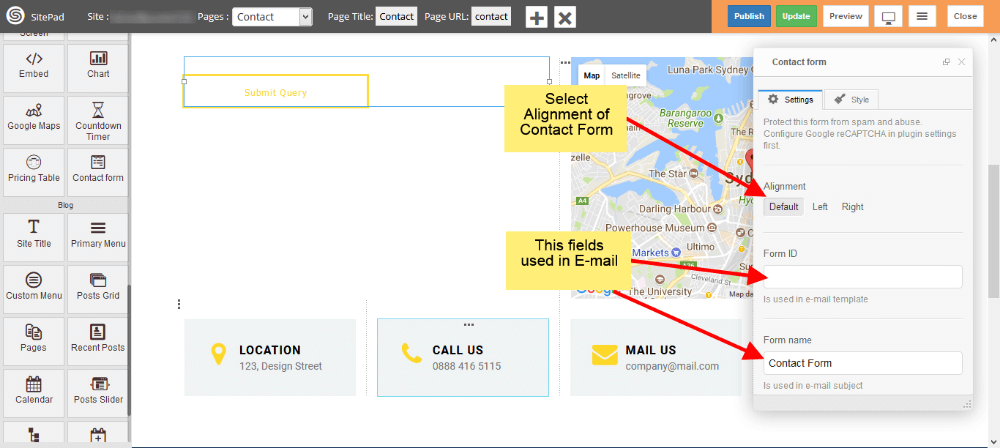
- To add new fields just click
onon Add New Field. To customize newly added field just click on that particular field as shown in image below.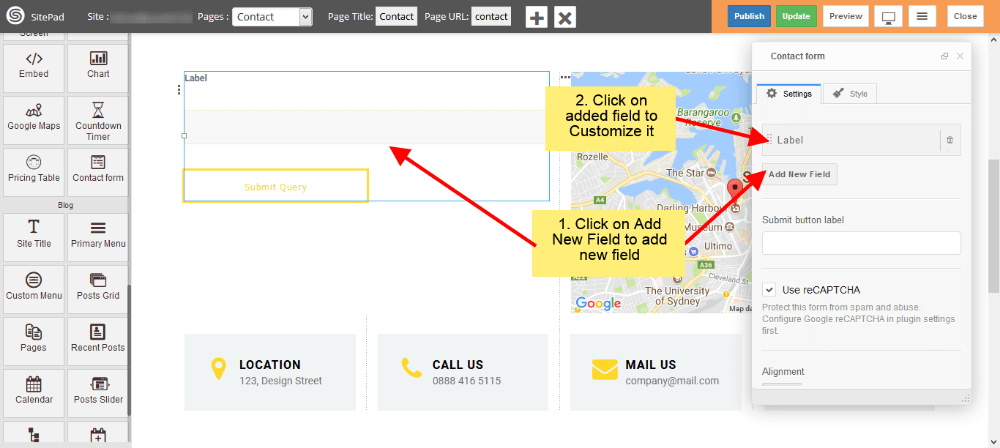
- Now
-
- Now
addadd Labellikelike Text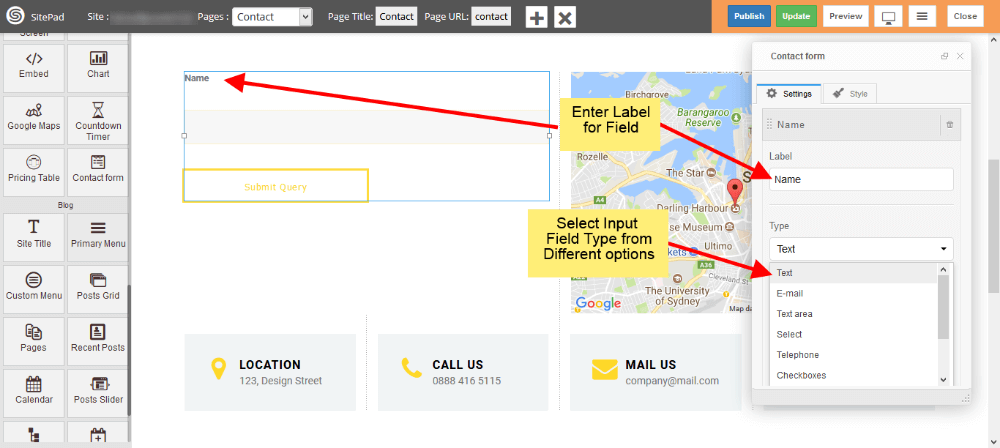
- Now
-
- To add the file upload option in contact form, Please
selectselect Fileformform Type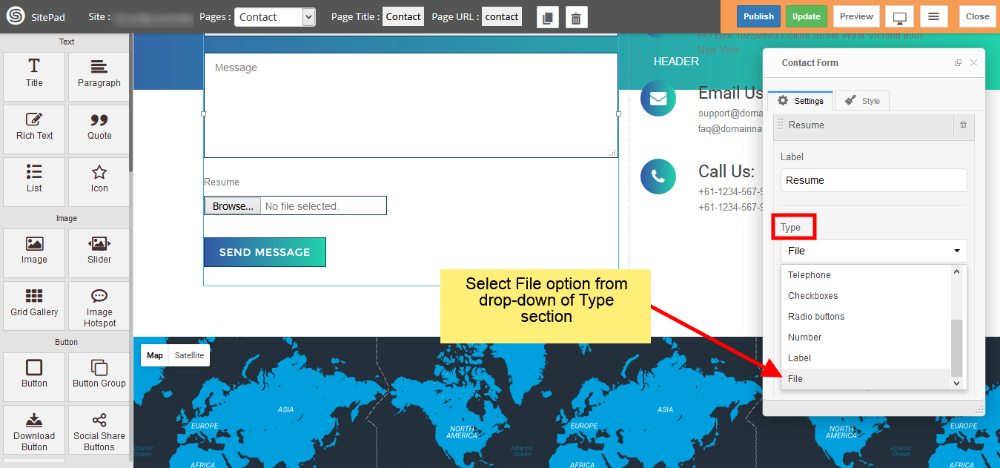
- To add the file upload option in contact form, Please
-
CheckCheck Use Label as Placeholderaa Placeholder. If you want any field asaa required fieldcheckcheck RequiredEnterEnter CSS classandand ID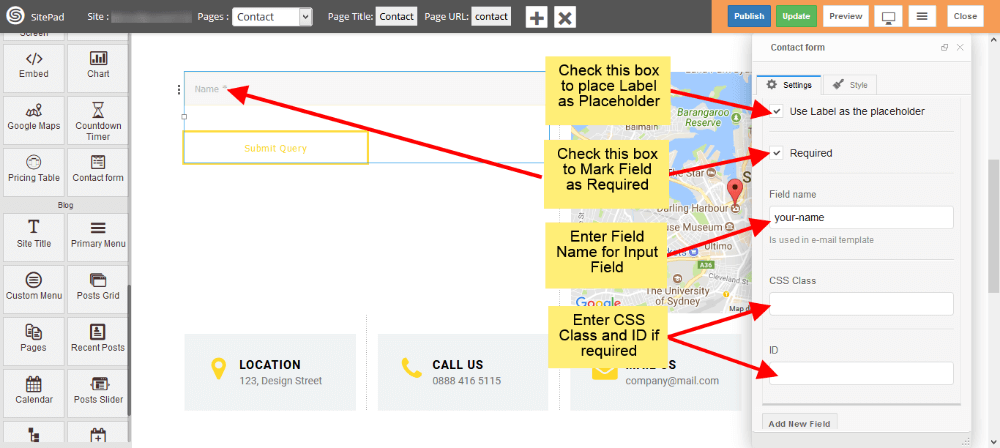
-
- You can add multiple input fields into
youryour Contact Form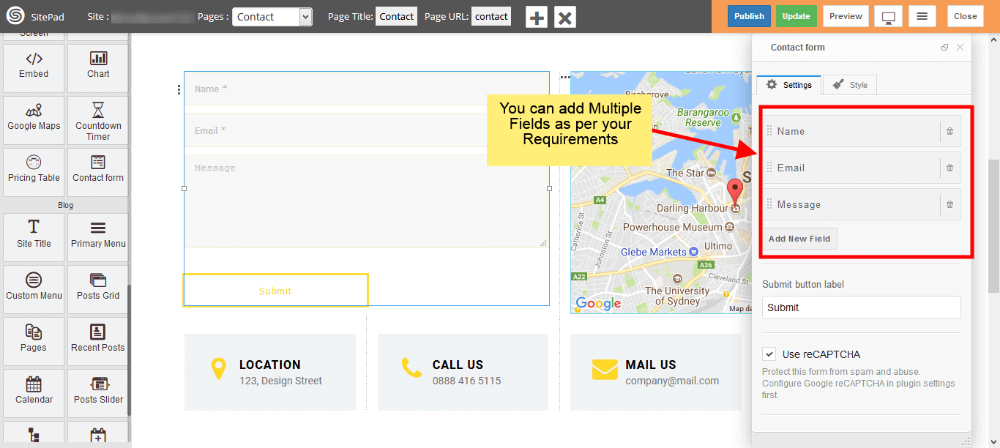
- You can add multiple input fields into
-
- You can
setset Reply To
- You can
- You can
addadd Custom Styleforfor Contact Form