# How to Add Email Template
This guide helps when you are using more than one Contact Form in your Website.
#### CONTACT FORM
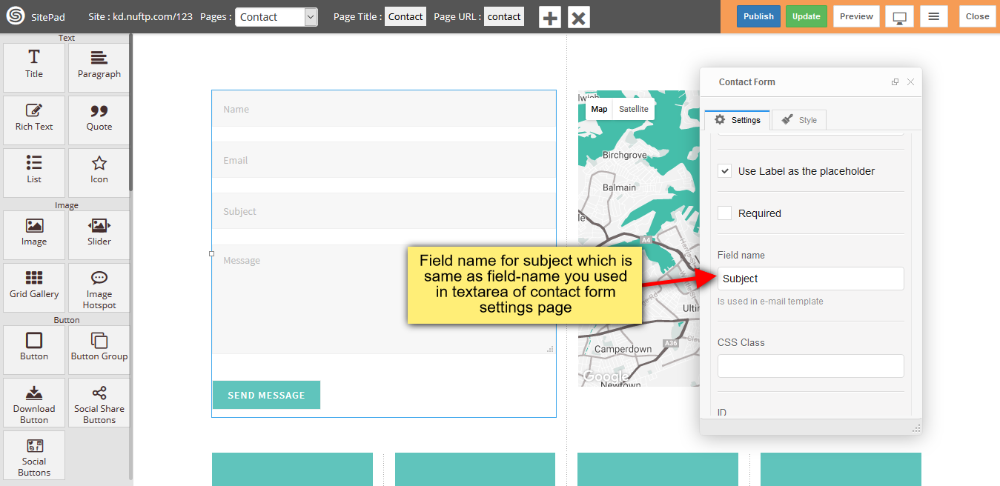
1. Insert **Field-Name** , this **Field-Name** you will use in **contact-form-id** Textarea box of contact settings page.
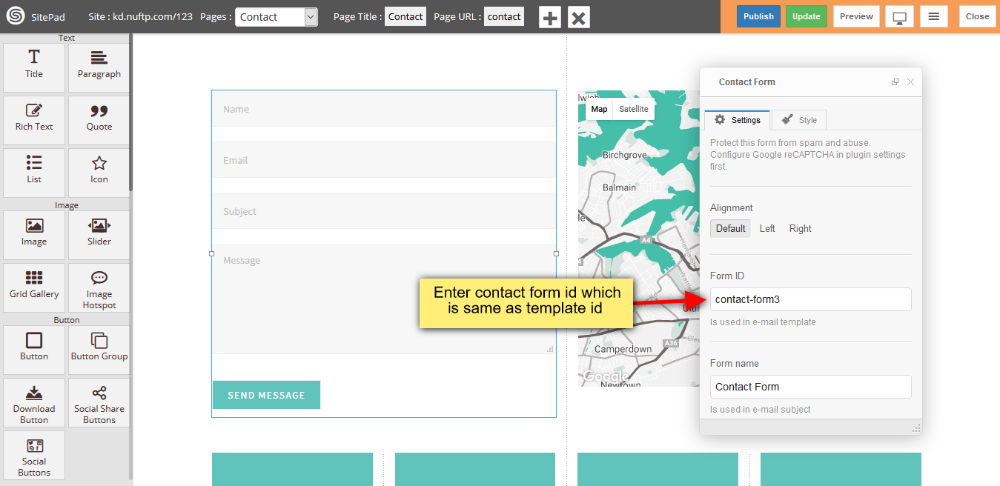
2. Insert **Form Id** , this **Form Id** you will use in **contact-form-id** Textbox box of contact settings page.
#### CONTACT SETTINGS PAGE
1. Go to SitePad **Settings** Menu in that click on **Contact Form** submenu. You can see the image shown below.
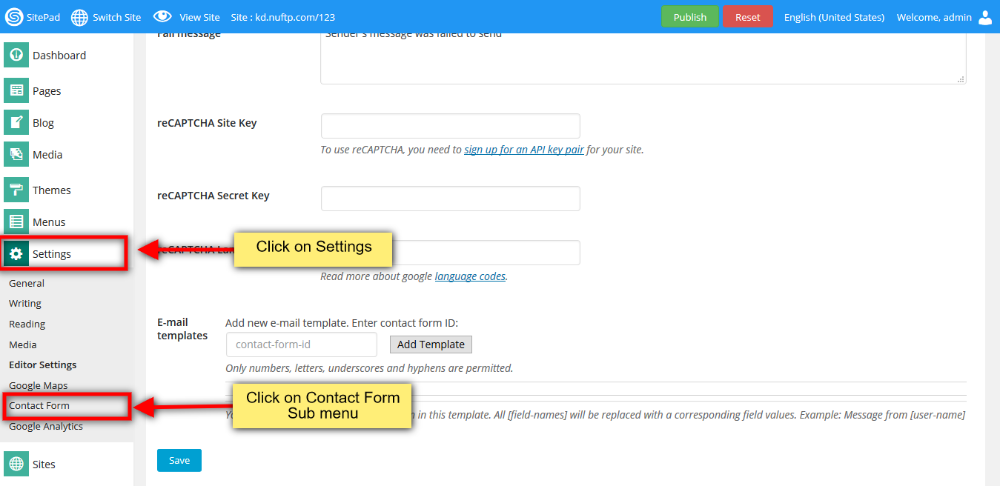
2. Now insert **contact-form id** which you inserted in contact form when you designed. And click on **Add Template** button.

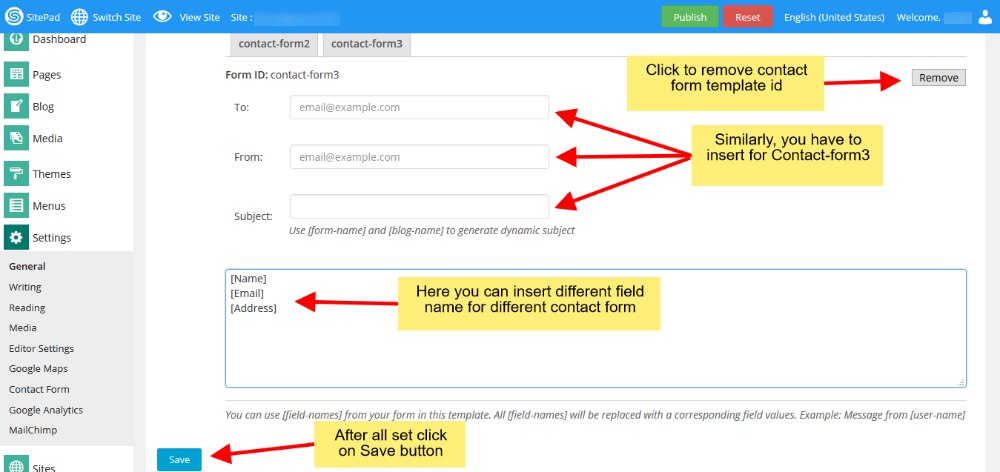
3. When you click on **Add Template** button and click on **Save** button then you will see image as shown below.
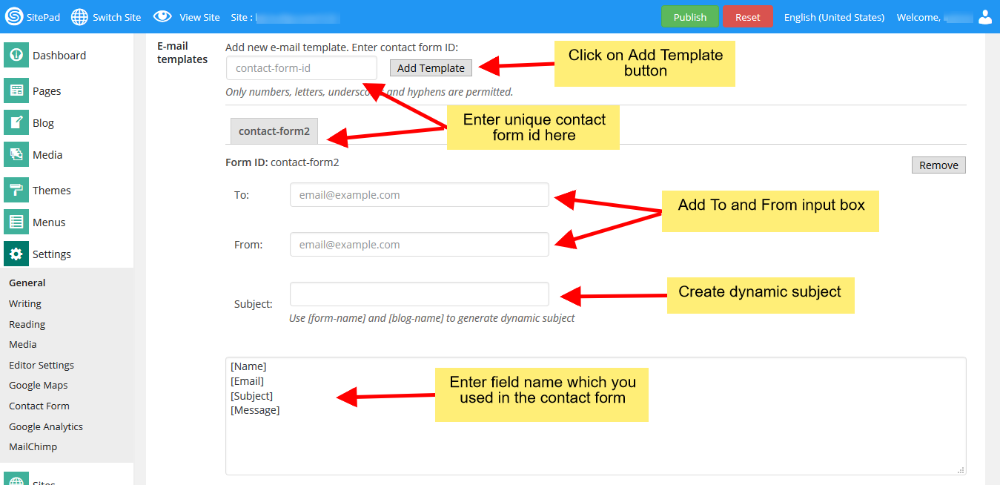
4. Enter Email address in **To** and **From** input box to a particular user for sending the details of a particular form. Textarea box you can see, in that you insert your **Field-Name** along with square bracket one-by-one. Click **Remove** button for removing the **contact-form-id** along-with all the details such as To, From, Subject and fieldname Textarea box. After all changes, click on **Save** button.