**Attention!** The following command is not safe to use, so use it only in very justified cases! Adding a command can damage the file system and cause data loss.
After connecting to the server via SSH, you can force restart by issuing the following command: ``` echo 1 > /proc/sys/kernel/sysrq && echo b > /proc/sysrq-trigger ```**Attention!** You cannot undo the release of this command!
The above command allows `sysrq` to be used. This allows us to communicate directly with the kernel. The second step sends the trigger `b` (to restart) to sysrq, which forces a restart. The system will restart within a few minutes approximately as if the reset button was pressed on the machine. After restarting the system, you will be able to find and fix the problem. # How to Create a Database BackupOf course, it is also possible to make an uncompressed dump, but it will take a lot more time and more space will be spent on dumped content.
``` mysqldump -u user_name -p database_name > db.sql ``` #### EXTRACT AN ARCHIVE You can do this by issuing the following command ``` gunzip < db.sql.gz | mysql -u user_name -p database_name ```**Important notice:** The user interface can only set the reverse value, if before you have assigned a type A (or IPv6 address type AAAA) record for the VPS IP address.
# How to Order a New VPS Server To use Dotroll Virtual Private Server (VPS), you must have an account payer account. If you don’t already have one, you can create one [here](https://admin.dotroll.com/register.php?swcfpc=1). After the login, you can start the order in the Order -> Virtual Server menu. Steps for ordering: 1. First, select the architecture. 2. Then select the operating system type. 3. After selecting the operating system, it is possible to select a version within the distribution and then specify the number of resource units. 4. You must then enter the administrator password. # How to Install and Configure CSF Firewall Ebben a cikkben elmagyarázzuk, hogyan telepíthető és konfigurálható a ConfigServer Security & Firewall-t (rövidítve a CSF). A CSF egy teljes körű biztonsági csomag, amit használhat tűzfal és behatolás / bejelentkezési hiba észlelő rendszerként. #### INSTALLING AND CONFIGURING CSF IN LINUX Ahhoz, hogy a CSF telepíthető legyen és normális módon fusson a Perl és a libwww csomagoknak telepítve kell lenniük a szerveren. A CSF-et jelenleg bármelyik RHEL, CentOS, openSUSE, Debian és Ubuntu disztribúció alá lehet telepíteni. ``` yum install perl-libwww-perl apt install libwww-perl ``` 1. **Download CSF**``` cd /usr/src wget https://download.configserver.com/csf.tgz ``` 2. **Extract the CSF tarball**``` tar xzf csf.tgz cd csf ``` 3. **Run the CSF Installation Script**A folyamat ezen része ellenőrzi, hogy az összes függőség telepítve van-e, létre hozza a webes felülethez szükséges könyvtárstruktúrákat és fájlokat, észleli az éppen megnyitott portokat, valamint figyelmezteti Önt arra, hogy a csf és az lfd démonokat újra kell indítani, miután elvégezte a kezdeti beállítást. ``` sh install.sh perl /usr/local/csf/bin/csftest.pl ``` A fenti parancs várható kimenete a következő: ``` Testing ip_tables/iptable_filter...OK Testing ipt_LOG...OK Testing ipt_multiport/xt_multiport...OK Testing ipt_REJECT...OK Testing ipt_state/xt_state...OK Testing ipt_limit/xt_limit...OK Testing ipt_recent...OK Testing xt_connlimit...OK Testing ipt_owner/xt_owner...OK Testing iptable_nat/ipt_REDIRECT...OK Testing iptable_nat/ipt_DNAT...OK RESULT: csf should function on this server ``` 4. **Disable Firewall and Configure CSF**Állítsa le, majd tiltsa le a firewalld-t a következő parancsok kiadásával, ezt követően állítsa be a CSF-et. ``` systemctl stop firewalld systemctl disable firewalld ``` Az `/etc/csf/csf.conf` fájlban módosítsa a `TESTING = "1"` változó értékét `TESTING = "0"`-ra különben az lfd démon nem indul el), ezt követően állítsa be a vesszővel elválasztva a bejövő és kimenő portokat (TCP\_IN és TCP\_OUT). A fájl tartalma megközelítőlegesen így kell hogy kinézzen: ``` # Testing flag - enables a CRON job that clears iptables incase of # configuration problems when you start csf. This should be enabled until you # are sure that the firewall works - i.e. incase you get locked out of your # server! Then do remember to set it to 0 and restart csf when you're sure # everything is OK. Stopping csf will remove the line from /etc/crontab # # lfd will not start while this is enabled TESTING = "0" # Allow incoming TCP ports TCP_IN = "20,21,22,25,53,80,110,143,443,465,587,993,995" # Allow outgoing TCP ports TCP_OUT = "20,21,22,25,53,80,110,113,443,587,993,995" ``` A megfelelő beállítások megadását követően mentse el a fájlt, majd lépjen ki a szerkesztőből. 5. **Restart and Test CSF**``` # systemctl restart {csf,lfd} # systemctl enable {csf,lfd} # systemctl is-active {csf,lfd} # csf -v ``` Innentől a CSF már használatra kész, azonban a tűzfal és behatolásérzékelés szabályait még célszerű beállítani. #### USEFULL CSF COMMANDS A jelenlegi tűzfal szabályok kilistázásához adjuk ki a következő parancsot: ``` # csf -l ``` A tűzfal szabályokat a következő parancs segítségével törölheti: ``` # csf -f ``` A tűzfal szabályokat a következő parancs segítségével töltheti újra: ``` # csf -r ``` A fenti parancsokat lehetőség szerint jegyezze meg mert a későbbiek során szüksége lehet rájuk amikor a **csf** és az **lfd** újraindításra kerül. ##### ALLOWING AND FORBIDDING IP ADDRESSES A bejövő kapcsolatok engedélyezése 192.168.0.10-től. ``` # csf -a 192.168.0.10 ``` Hasonlóképpen megtagadhatja a 192.168.0.11-ből származó kapcsolatokat. ``` # csf -d 192.168.0.11 ``` Eltávolíthatja a fenti szabályokat, ha ezt szeretné. ``` # csf -ar 192.168.0.10 # csf -dr 192.168.0.11 ``` A `-ar` illetve a `-dr` kapcsolók használata a fenti IP-címmel társított meglévő engedélyezési és megtagadási szabályokat eltávolítja. ##### LIMITING INCOMING CONNECTIONS BY SOURCE A kiszolgáló tervezett felhasználásától függően a kapcsolatokat korlátozhatja port alapon, és a beérkező próbálkozások száma szerint. Ehhez nyissa meg az `/etc/csf/csf.conf` fájlt, és keresse meg a `CONNLIMIT` részt. Megadható több port, a portokat `;` elválasztva adja meg. Például: ``` CONNLIMIT = "22; 2,80; 10" ``` a fenti példában csak 2 bejövő kapcsolatot engedélyez ugyanabból a forrásból a 22-es portra, míg a 80-as TCP port esetén egy IP címről maximum 10 kapcsolatot engedélyez. ##### SENDING ALERTS VIA EMAIL Számos riasztási típus beállítható, ehhez keresse meg az `EMAIL_ALERT` részt a `/etc/csf/csf.conf` fájlban, majd ellenőrizze le hogy az értéke `1`-re van e állítva. Például: ``` LF_SSH_EMAIL_ALERT = "1" LF_SU_EMAIL_ALERT = "1" ``` az `LF_ALERT_TO` résznél megadott email címre küldi minden egyes alkalommal, amikor valaki sikeresen bejelentkezik az SSH-n keresztül, vagy átvált egy másik fiókra a `su` parancs segítségével. #### CSF CONFIGURATION FILES A következő fájlok segítségével módosítható a `csf` működése. A `csf` összes konfigurációs fájlja a `/etc/csf` könyvtár alatt található. Az alábbi fájlok módosítása esetén a `csf démont újra kell indítani.` - **csf.conf**: A CSF fő konfigurációs állománya. - **csf.allow**: A tűzfalon engedélyezett IP és CIDR címek listája. - **csf.deny**: A tűzfalon található tiltott IP és CIDR címek listája. - **csf.ignore**: A tűzfalon a figyelmen kívül hagyott IP és CIDR címek listája. - **csf.\*ignore**: A tűzfalon a figyelmen kívül hagyott egyéb felhasználók, fájlok, IP címek listája. #### REMOVE CSF Ha teljesen el szeretné távolítani a CSF-et, akkor futtassa a `/etc/csf/uninstall.sh` ``` #/etc/csf/uninstall.sh ``` A fenti parancs teljesen törli a CSF-et az összes fájlt és mappát. # How to install OpenClaw on VPS #### **Step 1: Connect to Your VPS** From your local computer, connect to your server via SSH: ssh root@YOUR\_SERVER\_IP Replace YOUR\_SERVER\_IP with your VPS public IP address. #### **Step 2: Update Your Server** Update the package list and install available updates: apt update apt upgrade -y 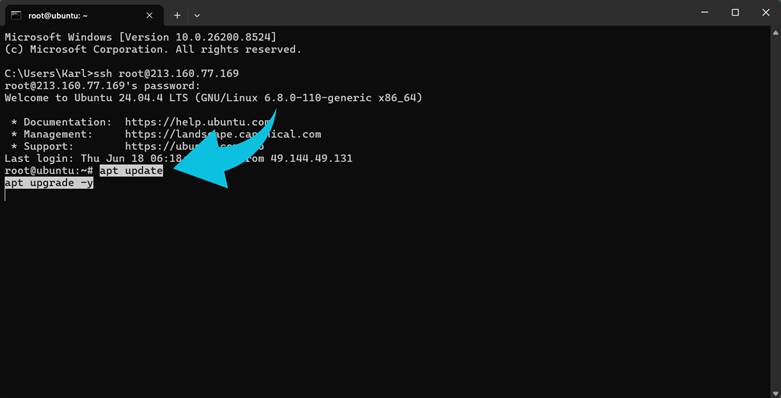 #### **Step 3: Install Required Packages** Install curl if it is not already available: apt install -y curl 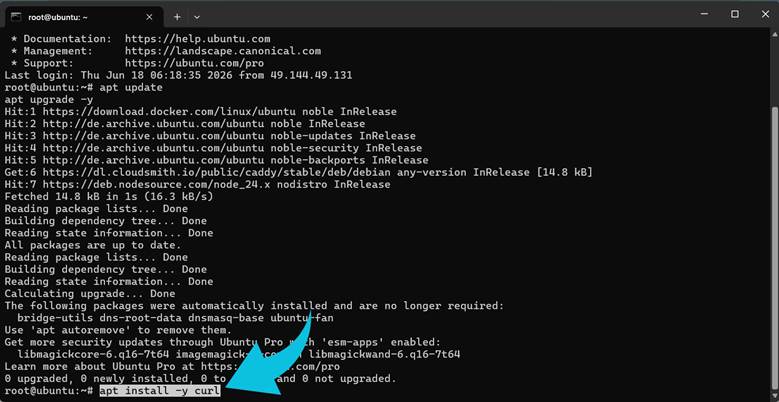 Verify the installation: curl --version 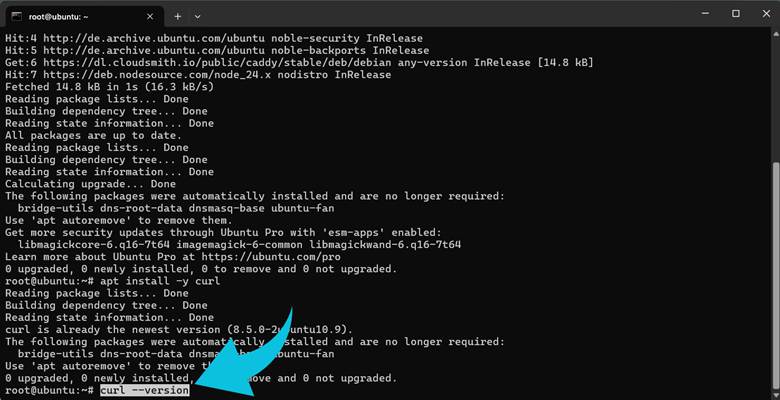 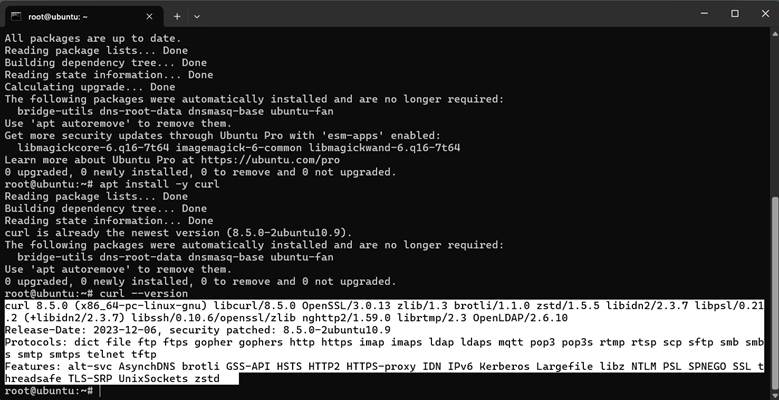 #### **Step 4: Install OpenClaw** Run the official installation script: curl -fsSL https://openclaw.ai/install.sh | bash 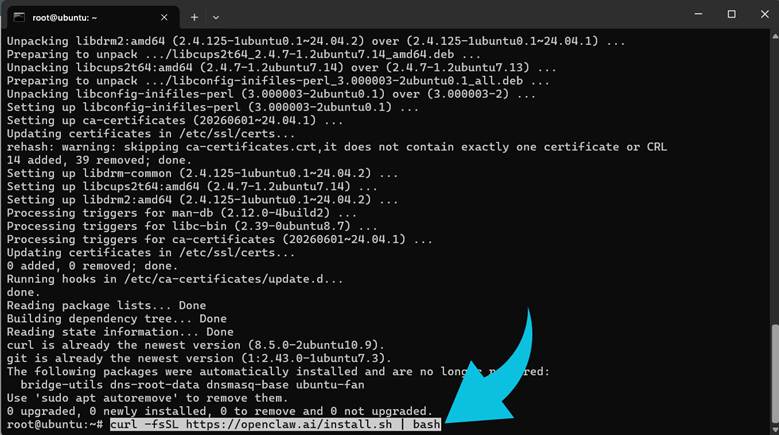 The installer downloads OpenClaw and automatically launches the initial setup and onboarding process. During onboarding: ● Configure your preferred AI model  ● Create your workspace 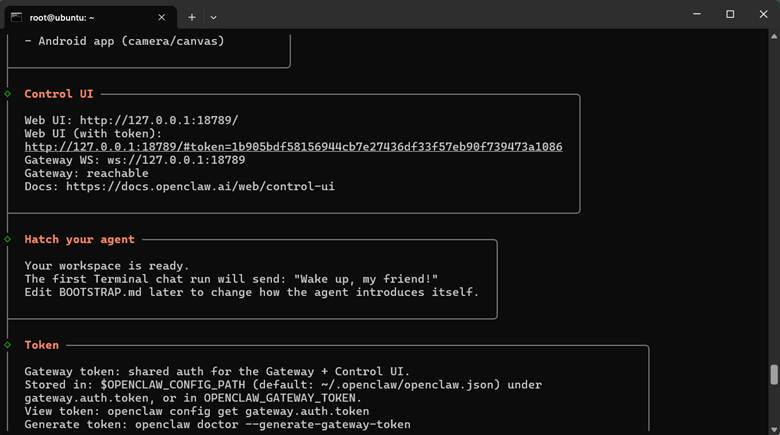 ● Allow OpenClaw to install and start the Gateway service Follow the on-screen prompts until the installation is complete. When it's complete, launch the terminal interface, and you can send a simple message: Hello 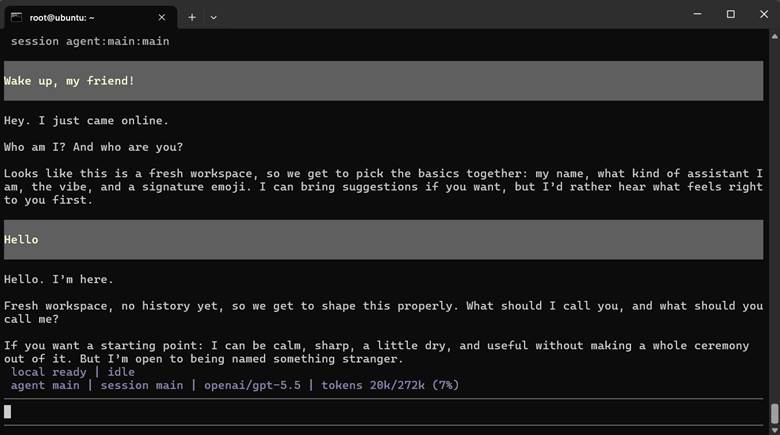 If the assistant responds successfully, OpenClaw is working correctly. #### **Step 5: Verify the Installation** After onboarding finishes, verify that OpenClaw is running correctly: openclaw status 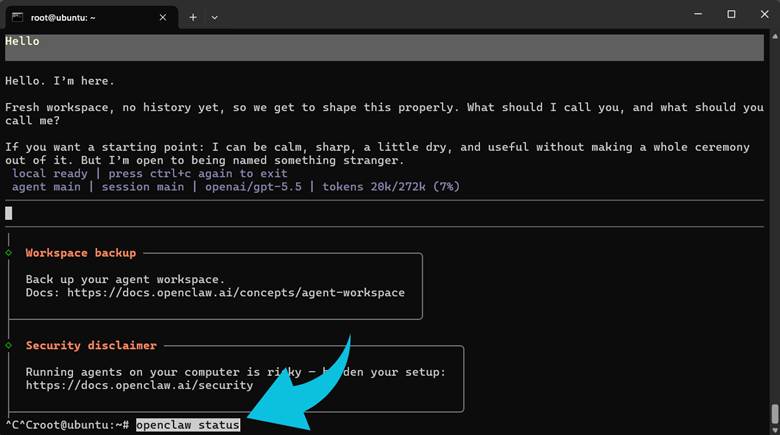 #### **Step 6: Access the OpenClaw Dashboard from Your Computer** Because the gateway listens only on localhost by default, create an SSH tunnel from your local computer. On Windows, macOS, or Linux: ssh -N -L 18789:127.0.0.1:18789 root@YOUR\_SERVER\_IP 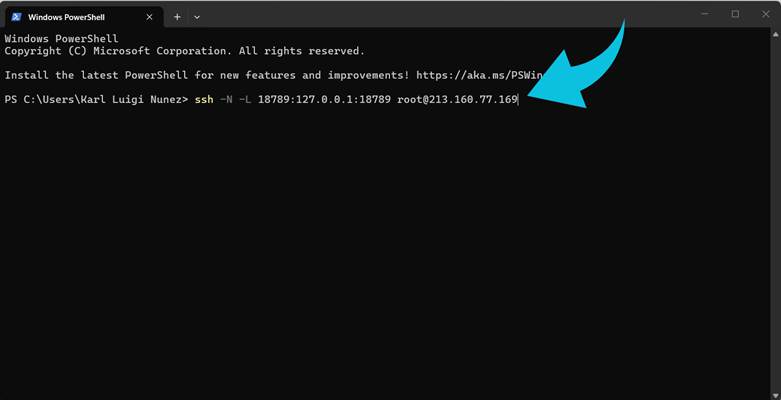 Keep this terminal window open. Open your browser and visit: http://localhost:18789 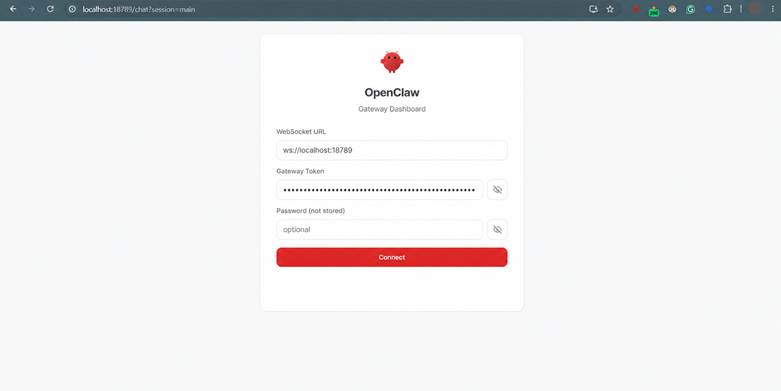 You should see the OpenClaw Gateway Dashboard. Once connected, you can begin interacting with your OpenClaw workspace through the web interface. From the dashboard, you can manage agents, view conversations, monitor gateway activity, configure integrations, and access your OpenClaw environment in a browser rather than the terminal. ### **Common OpenClaw Installation Issues and Fixes** #### **Error: E: The update command takes no arguments** This error typically occurs when multiple commands are pasted onto a single line. Incorrect: apt update apt install -y curl Correct: apt update apt install -y curl Run each command separately to avoid syntax errors. #### **Error: Missing config. Run openclaw setup** You may see the following message when starting OpenClaw: Missing config. Run `openclaw setup.` This usually means the required configuration files and workspace directories have not been created. To initialize the configuration manually, run: openclaw setup After the setup completes, restart OpenClaw and verify that the gateway is running correctly. #### **Error: Gateway Scope Upgrade Approval Required** In some cases, OpenClaw may report that a device is requesting additional permissions. Check the status: openclaw status --deep If a scope upgrade is pending, approve the request: openclaw devices approve --latest Once approved, restart the gateway: openclaw gateway restart #### **Error: Dashboard Loads but Cannot Connect** If the OpenClaw dashboard opens but remains unable to connect to the gateway, first verify that the gateway is running: openclaw gateway status Then check the logs: openclaw logs --follow Review any authentication, device, or connection errors reported in the logs. #### **Error: SSH Tunnel Not Working** If you cannot access the dashboard from your local computer, verify that the SSH tunnel is active: ssh -N -L 18789:127.0.0.1:18789 root@YOUR\_SERVER\_IP Then test the connection locally: curl http://localhost:18789/healthz Expected output: {"ok":true,"status":"live"} If the endpoint responds successfully, the SSH tunnel and gateway are functioning correctly.