When generating a CSR file, a private key is created that will allow the certificate to be installed after the certificate is issued. cPanel also generates and stores the private key, which can be accessed on cPanel at any time.
There are several options for creating a private key and its associated CSR file
- [How to generate a private key and CSR from the Linux command line?](https://dotroll.com/en/knowledge-base/books/settings-guides-HCv/page/how-to-generate-a-csr-and-private-key-in-linux-via-command-line "How to generate a private key and CSR from the Linux command line?")
- [How to generate a private key and CSR on the Microsoft Windows system?](https://dotroll.com/en/knowledge-base/books/settings-guides-HCv/page/how-to-generate-a-csr-and-private-key-on-windows "How to generate a private key and CSR on the Microsoft Windows system?")
1. Log in to cPanel.
2. Find the **SSL/TLS** and click on it to load.

{%CAPTION%}
3. In the SSL/TLS page find the **Certificate Signing Requests (CSR)** and click the **Generate, view, or delete SSL certificate signing requests.** link.
{%CAPTION%}
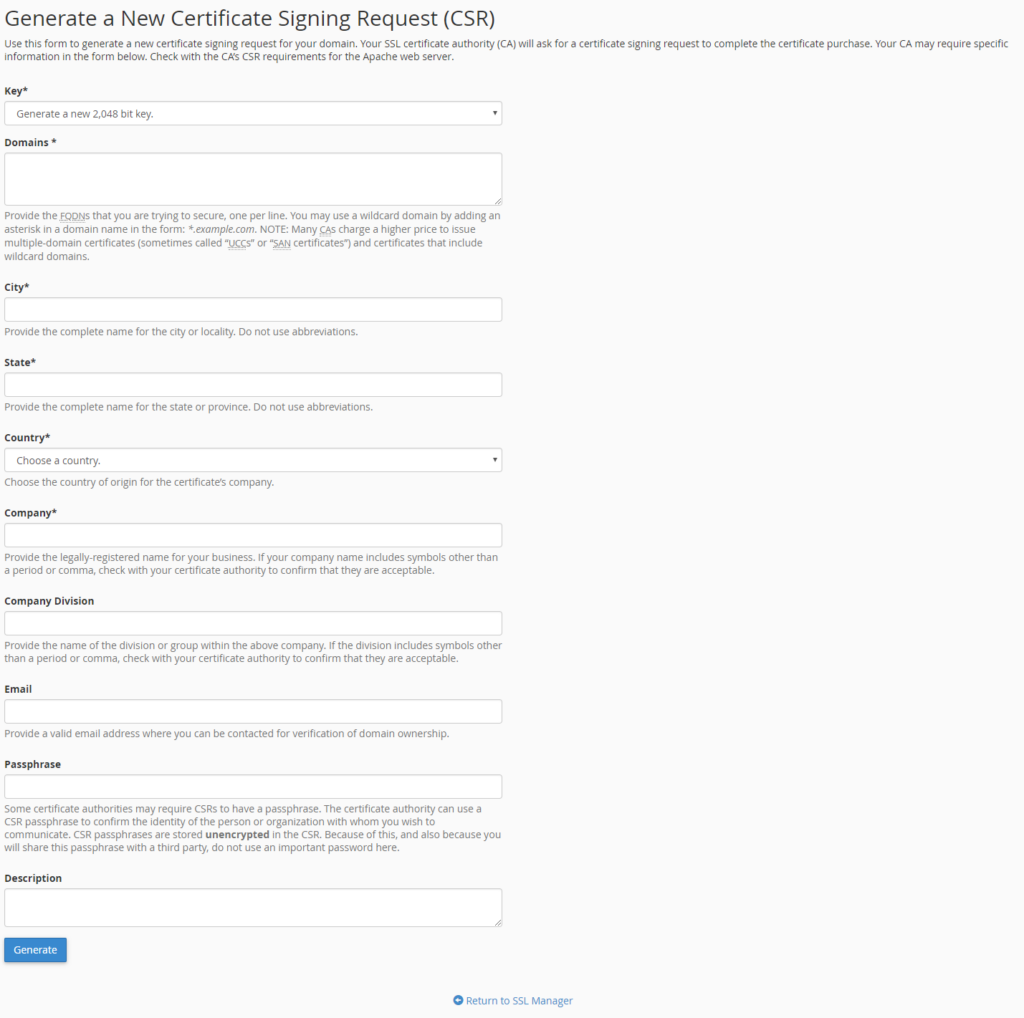
4. You will need to enter the following information on the page that appears (*fill in the marked fields*):
- **Key**: If you have not previously created a secret key, you can choose the secret key strength.
- **Domains**: In this field, you must enter the domain name or subdomain name for which the certificate will be issued by the certificate issuer. This field does not need to enter “http://” “https://” prefixes.
The domains field should normally be the domain name, for example: example.com. If you require an SSL certificate for a subdomain, you must enter the subdomain.example.com. If you want to request a wildcard SSL certificate, you should start with \*, for example: \*.example.com where example.com represents the domain name. If you enter multiple domain names, enter a domain name per line.
- - **City**: Enter the
- organization headquaters city
- in the case of a natural person, the city in which you are staying
-
- - **State** : Provide the state or county in which:
- the headquarters of the organization
- in the case of a natural person, the state or county of the city to which it belongs belongs
- **Country**: From the drop-down list, select:
- country of the organization
- in the case of a natural person, your country of residence
- **Company**: Enter the:
- organization’s full or abbreviated name
- in the case of a natural person, his full name
- **Company Division**: you can enter the name of the department within that organization.
- **Email**: You can specify an email address that can be used to contact you.
- **Passphrase**: You can specify a passpharse. Some certificate authorities may require CSRs to have a passphrase.
- **Description**: For easier identification, it is a good idea to give a unique name to the CSR file.
- 5. Once you have entered the data, click the **Generate** button.
6. After generation, the page will display the CSR file in two formats. You will need to copy the text that appears in the **Encoded Certificate Signing Request** part to the order which looks like this: ```
-----BEGIN CERTIFICATE REQUEST-----
CSR CODE
-----END CERTIFICATE REQUEST-----
```