Other
- What to Do If You Have Exceeded Your Bandwidth Limit
- What to Do If Your Website Is Flagged as an Attack Site
- DotRoll Web Hosting Security Features and Solutions
- How to Set Up a Cron Job
- What Is SSL
- How to Renew Your Hosting Service
- How to Create and Edit Files via SSH
- How to Transfer a Service to Another Billing Account
- Setting Up Supabase Using Docker Desktop
- Setting Up Supabase via Command Line
What to Do If You Have Exceeded Your Bandwidth Limit
If you have received a notification email for accessing the bandwidth traffic limit, you can opt in to https://admin.dotroll.com for additional data traffic after logging in.
Steps for ordering:
- After logging in, click on Services / My Services.
- In the Actions box in the left sidebar, click the View Available Addons.
- On the page that appears, select the data bundle you want to purchase, then click Order Now.
- Then click the Checkout button and check the billing information.
- Select the form of payment and select “I have read and agree to the Terms of Service” and click Complete Order.
What to Do If Your Website Is Flagged as an Attack Site
Unfortunately we are unable to help with the reported attack site because we did not put this type of blocking on Google, but we did not. This type of blocking is useful because the visitor’s tool does not get infected, but it’s pretty uncomfortable.
To resolve this issue, follow these steps:
- For devices from which you signed in to your site, or to scan for a virus on your web site.
- Then log on to https://admin.dotroll.com and modify your hosting password as well as your FTP users’ passwords.
- If you have received a CXS notification, you can view the files in the notification email if you do not find the code code for the program code in the code then remove them. If you are using a content management system (CMS), you should definitely upgrade both the content manager and the installed add-on modules and templates.
If you have not created the website, contact the developer of the website, as we will not be able to help you with programming issues.
Google will review websites for up to 90 days, if you do not want to wait for it, you can do this by following these steps to speed up blocking.
- If the site is cleaned from harmful code sequences, please read the Google Search Console
In addition, the StopBadware site, which is http://www.stopbadware.org/ - Next, you’ll need to look at the Google Diagnostic page that you can access (at the end of the URL you want to replace): http://www.google.com/safebrowsing/diagnostic?site=http://your_domain_name.tld
Note: At the end of the URL, replace the yourn_domain_name.tld with the domain name that is experiencing the problem.
- Then, sign in to Google Webmaster Tools where you can apply for a review.
- Find it on your site with the Badware Website Clearinghouse, then click the links in the Report column to get a review of the pages by clicking the “Click to Request Review” link on the left. http://www.stopbadware.org/home/reportsearch
- If you have been granted pishing as a page, please also review the link below. http://sb.google.com/safebrowsing/report_error/
Wait for a few days, or maybe seven weeks for the systems to pass through the news of infection, and will also be able to tell you about success in Webmaster Tools.
If you have any further questions, please feel free to contact our Customer Service.
DotRoll Web Hosting Security Features and Solutions
While developing DotRoll non-free hosting, we paid special attention to security. These security features include:
SYSTEM USERS
Unlike usual hosting solutions, security starts at the system level. Every hosting account is a system user. This allows us to run applications like Perl, Python, Ruby on Rails.
HARDENED KERNEL
Our kernel has been hardened to suit the security needs of our clients. For example, users may only see their own processes.
VIRTUAL MINI ENVIRONMENT
Every user has a very own miniature environment (chroot) in which the applications run and FTP is jailed into. This allows us to provide users with SSH access.
OUTGOING CONNECTIONS
As we reckon the need for using API’s, we have developed a solution to monitor abuse and thus allow free access to external sites to our users. PHP, for example has been fitted with all the technology we could pack into it (SOAP, XML-RPC, etc).
E-MAIL SOLUTIONS
All outgoing mail is bound to users transparently. Every user may send only from a domain belonging to that very account. Outgoing mail is digitally signed, which more and more e-mail providers recognize as a sign of trust and verifiability. Blacklists and e-mail trafic are constantly monitored so your legitimate e-mail may pass unhindered and get right where it belongs – in your user’s inboxes.
How to Set Up a Cron Job
There are two options for setting.
- For the file you want to run on a file in a timely manner, at least the owner has to run the run right (0700). Also, at the beginning of the file (in the first line) you have to specify the appropriate interpreter for the file type.
For PHP file:
#!/usr/bin/php
For Shell script:
#!/bin/bash
In this case, the file should be given in the timed scripts menu in the following format: /home/username/public_html/cron.php
- Only enter the interpreter in the Timed Scripts menu before the file to run, in the following format:
For PHP file:
php /home/username/public_html/cron.php
For Shell script:
/bin/sh /home/username/public_html/file.sh
In the latter case, you do not have to configure the file for the file.
What Is SSL
SSL / TLS is a protocol that provides secure data transfer. If supported by two endpoints of the connection, almost any other protocol can be transmitted via SSL.
An important feature of SSL is its signature. The keys can be signed and authenticated. Software vendors (such as browsers) embed embedded browsers into a list of the signatories they recognize, which are automatically accepted by the software. In other cases, the software will ask you to accept the key.
How to Renew Your Hosting Service
Follow these steps to renew:
- Log in at https://admin.dotroll.com/ with the email address you entered, when you registered your account.
- Click on the green Active icon.
- After the page loaded, below Hosting Renewals, click on Renew service for 1 year button.
Our system then draws up a billing account that allows you to extend the service immediately via credit card or PayPal.
How to Create and Edit Files via SSH
There are several ways to create a file through SSH. In this article, we will present the file creation with two types of word processors.
- nano – for beginner users
- vim – for advanced users
If you are editing files from a cumbersome command line, we recommend that you create a file via FTP, you can use this description below:
Create and modify a file via FTP
The following description is just an example of how to create or modify a file using SSH. Following the description, make sure you create the file at the right place. If you modify it, edit the file you want.
CREATING A FILE USING NANO
- Log in to the server on SSH.
- Navigate to the directory where you want to create or edit the file.
- Next, type the nano command and then divide by space, enter the name of the file you want to create/edit.
[server] $ nano .htaccess 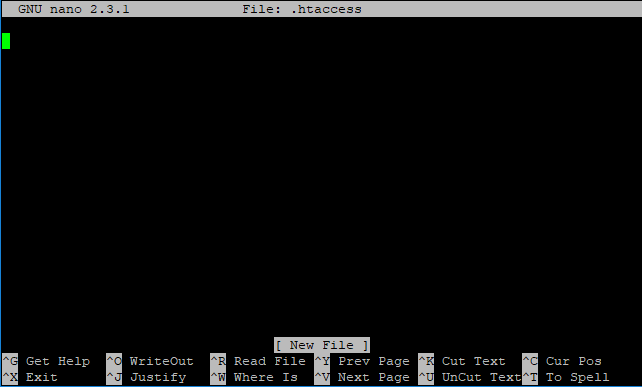
Next, start typing the contents of the file.- When you have uploaded the file with the required content, hold down the Ctrl key and press the O key (Ctrl + O).
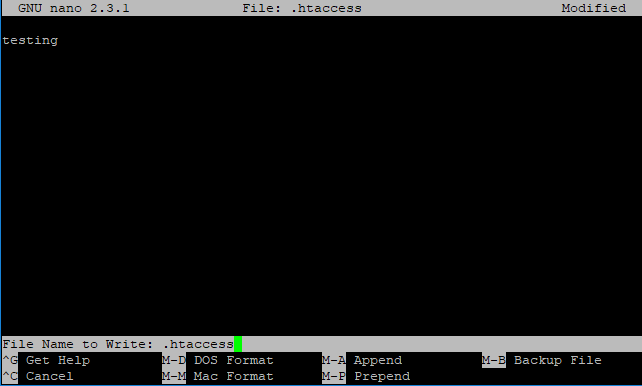
At the bottom of the screen, the editor will ask you again about the name of the file you previously specified. - You can confirm the file by pressing Enter.
- Press Ctrl+X to exit the word processor.
CREATING A FILE USING VIM
- Log in to the server on SSH.
- Navigate to the directory where you want to create or edit the file.
- Next, type the vim command, and then divide by space, enter the name of the file you want to create/edit.
[server] $ vim .htaccess 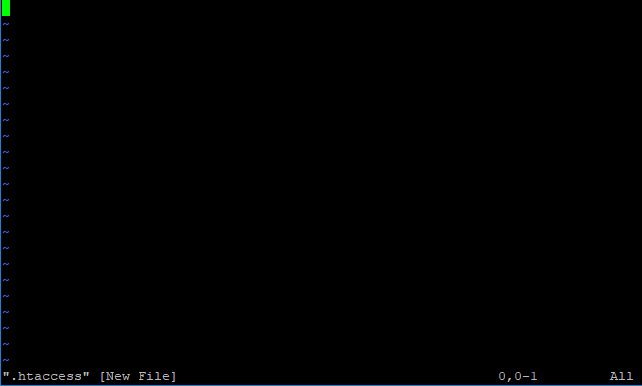
After the word processor starts, you can upload the file by pressing the i key as it changes to INSERT mode.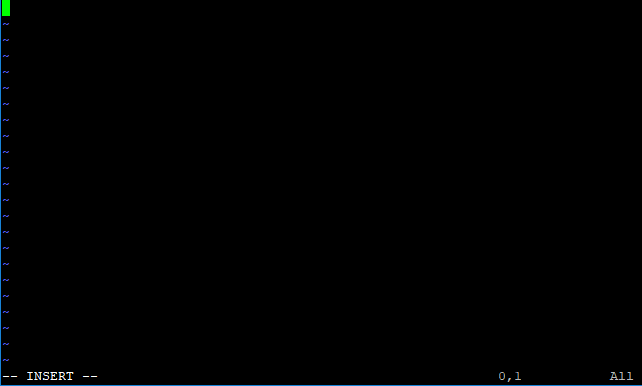
- When you upload the file with the required content, use Esc to exit the insertion mode.
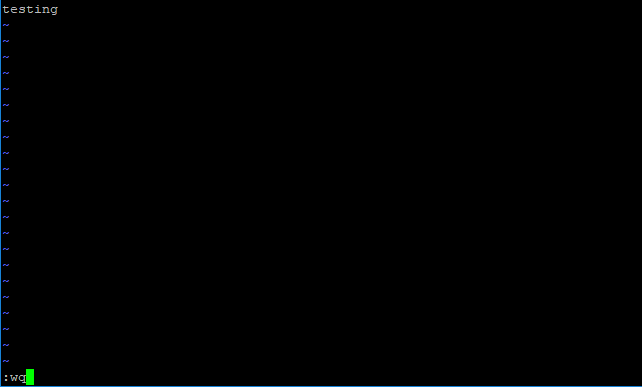
To save the file, type :wq, and then use the Enter key to save the file.
How to Transfer a Service to Another Billing Account
Transfer steps:
- Log in to our system with your email address and password, then click on the Services / My Services menu item in the top menu line.
- Next, click the service you want to transfer, and then click Transfer service to user in the Actions box on the left.
- On the page that appears, in the Transfer to user: field, enter the email address or username of the person or organization to whom you want to transfer the service name, and then click Check user name button.
- Our system then checks to see if this is a genuine bill payer based on the information you provided, and then displays the information. If you find the information correct, click the Confirm button.
- The interface will then display the services already handed over, here you have the option to cancel the previous handover.
- The system alerts the other user after logging in that services are waiting to be received.
Setting Up Supabase Using Docker Desktop
If you’re new to self-hosting or want a simple, visual setup, Docker Desktop offers the easiest way to run Supabase locally. It provides a graphical interface for managing containers, configuring ports, and ensuring your data persists across restarts—no command-line work required.
Step 1. Install Docker Desktop
● Download Docker Desktop for your operating system.
● Install it following the installer instructions.
Windows users: Enable WSL2 during installation and restart if prompted.
● Open Docker Desktop and make sure it’s running. You should see the Docker whale icon in your system tray or menu bar.

Step 2. Prepare a Folder for Data
● Supabase stores data (PostgreSQL database, file uploads) in volumes. To make your data persistent:
○ macOS / Linux: ~/supabase-data
○ Windows: C:\supabase-data

This folder ensures your data is safe even if you remove or update containers.
Step 3. Pull the Official Supabase Images
Supabase uses multiple Docker images for its services: PostgreSQL, Auth, Realtime, Storage, API, and Studio. You can pull them directly in Docker Desktop:
- Open Docker Desktop and go to the Images tab.
- In the search bar, enter the official image names:
○ supabase/postgres
○ supabase/gotrue
○ supabase/realtime
○ supabase/storage-api
○ supabase/postgrest
○ supabase/studio
- Click Pull for each image to download it to your machine. Repeat for all images.

Step 4. Create Containers for Each Service
Once the images are downloaded, you need to create a container for each service:
- Go to the Containers/Apps tab in Docker Desktop and click + Add Container.
- Select the image you just pulled.
- Configure settings for each container:
○ Name: Give it a meaningful name (e.g., supabase_postgres, supabase_auth).
○ Ports: Map the container ports to host ports:
■ PostgreSQL: 5432
■ Supabase Studio: 3000
■ Others use default ports (check each service documentation).
○ Volumes: Bind your host folder to the container for persistence:
■ Example: ~/supabase-data → /var/lib/postgresql/data for PostgreSQL
○ Environment Variables: Set essential keys:
■ POSTGRES_PASSWORD, JWT_SECRET, ANON_KEY, SERVICE_ROLE_KEY
○ Restart Policy: Always or Unless Stopped
- Click Run to launch the container. Repeat for all Supabase services.

Step 5. Access Supabase Studio
● Once all containers are running, open your browser and go to:
http://localhost:3000
● You now have full access to Supabase Studio and can manage your database, authentication, and storage visually.

Step 6. Updating Supabase
When new Supabase releases are available:
- Stop and remove the containers using Docker Desktop.
- Pull the updated images (Images tab → Pull).
- Recreate containers using the same settings and volume mappings.
Because your data is stored in persistent volumes, it remains safe during updates.
Step 7. Maintenance and Monitoring
● Docker Desktop lets you monitor resource usage, logs, and container health.
● Regularly check logs for errors and ensure your data folder has sufficient disk space.
● For production or long-term local usage, consider automating container updates using Watchtower.
Setting Up Supabase via Command Line
For developers and teams who prioritize automation, version control, or deployment on remote servers, the command-line approach provides flexibility and repeatability. Using Docker and Docker Compose directly allows you to manage Supabase stacks efficiently and integrate the process into scripts or CI/CD pipelines.
Step 1. Install Docker and Docker Compose
● Linux:
sudo apt update

sudo apt install docker.io docker-compose -y

● Windows/macOS: Docker Desktop includes both tools, so no additional installation is needed.
Verify Docker is running before proceeding.
Step 2. Clone the Supabase Repository
git clone https://github.com/supabase/supabase.git
cd supabase/docker

This repository contains the docker-compose.yml configuration defining all core services: PostgreSQL, APIs, authentication, Realtime, storage, and Supabase Studio.
Step 3. Configure Environment Variables
Copy the example environment file and customize it:
cp .env.example .env

Edit .env to set your credentials and keys:
● POSTGRES_PASSWORD: PostgreSQL database password
● JWT_SECRET: authentication token secret
● ANON_KEY and SERVICE_ROLE_KEY: API access keys
Properly securing these values is critical, especially in production environments.
Step 4. Launch Supabase
Start the services in detached mode:
docker compose up -d

Docker Compose pulls all necessary images and runs the containers, including database, authentication, Realtime, API, and Studio.
Step 5. Verify and Access the Platform
Check that all containers are running:
docker ps

Then open Supabase Studio in your browser:
http://localhost:3000
You now have full access to your self-hosted backend.