# FTP
# How to Create an SFTP Connection Using FileZilla
On cPaneles servers, it is only possible to establish an SFTP connection with the FTP user associated with the hosting ID.
#### [GENERATE SSH KEY, OR SET IT UP](https://dotroll.com/en/knowledge-base/books/cpanel/page/how-to-generate-and-configure-ssh-keys "SSH kulcspár létrehozása, vagy beállítása")
#### REMOVE A PASSWORD FROM THE PRIVATE KEY AND SET THE KEY IN FILEZILLA
Start FileZilla.
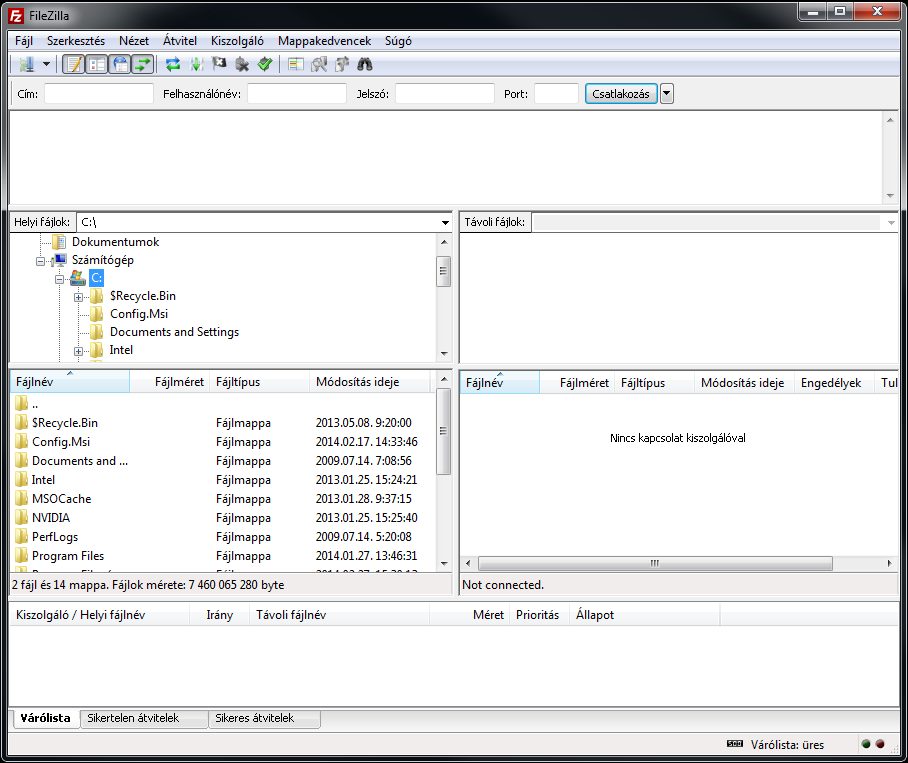
FileZilla main window
In the next step, click **Edit** / **Preferences…** in the top menu bar.
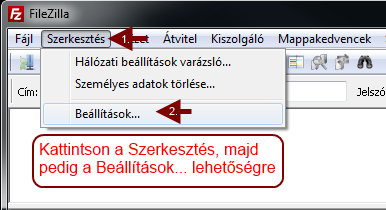
FileZilla Edit/Settings menu
In the popup window, click **SFTP** in the list on the left, then click **Add Key File…** button.
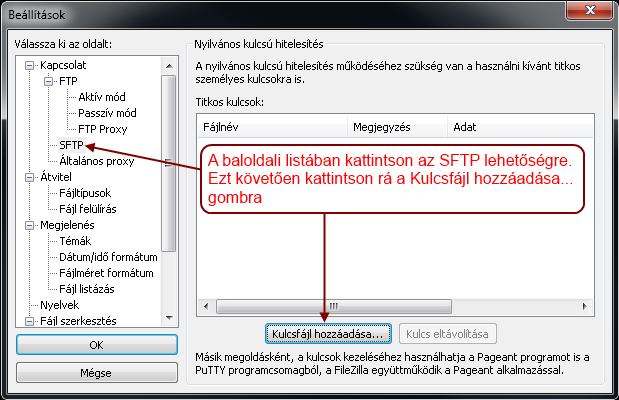
FileZilla Settings menu
Browse to the created private key file and confirm the warning with **OK** button.
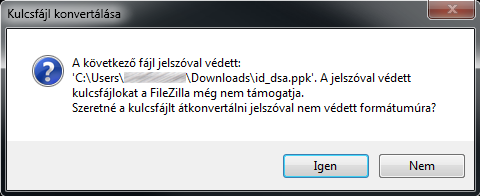
Converting key
Enter the password that you entered when creating the key, and then click **OK** button.
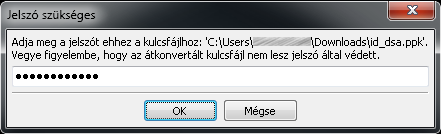
Type password
The private key will then appear in the Secret Keys list. Click **Ok** to close the window.
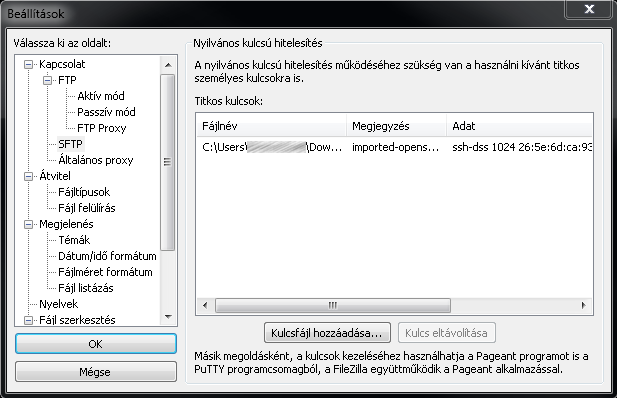
Added key
#### CREATING THE CONNECTION
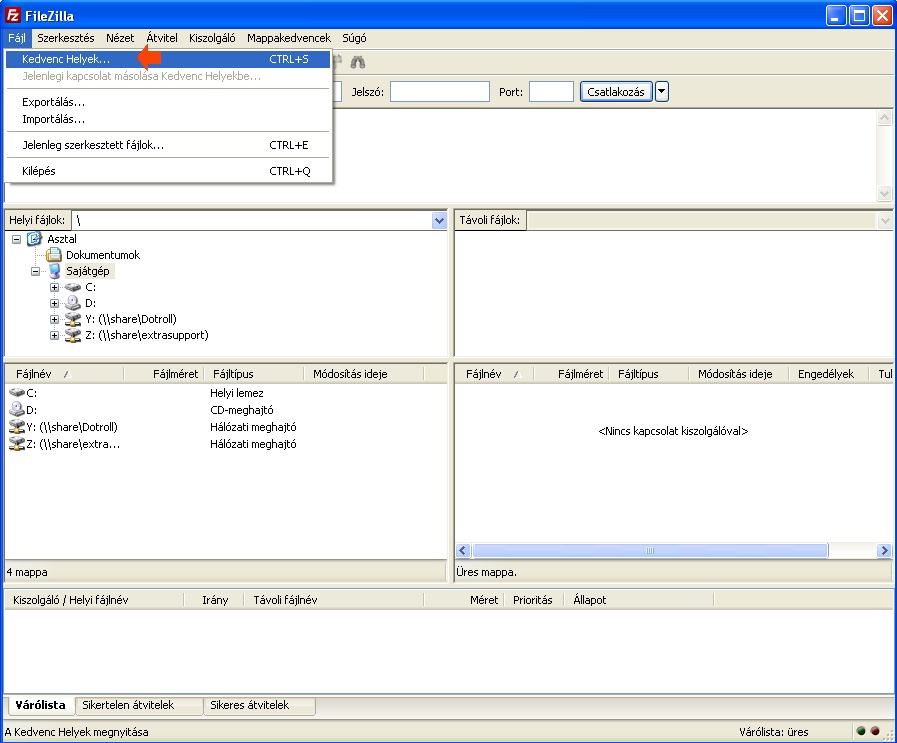
In the top menu bar of FileZilla, click **File** / **Favorite Places…** or press **CTRL+S**.
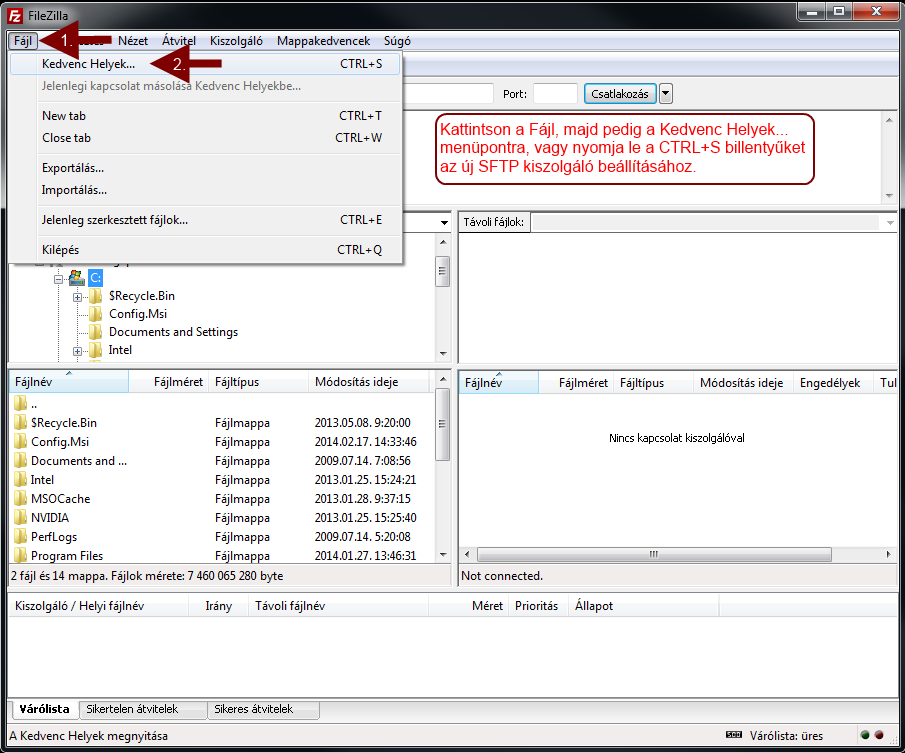
Connecting
In the popup window, click the **New Station** button.
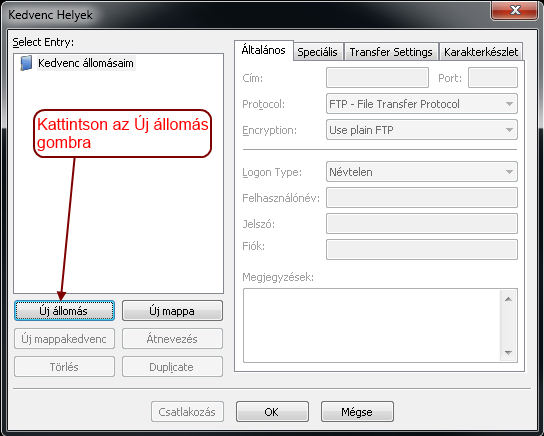
Create new connection
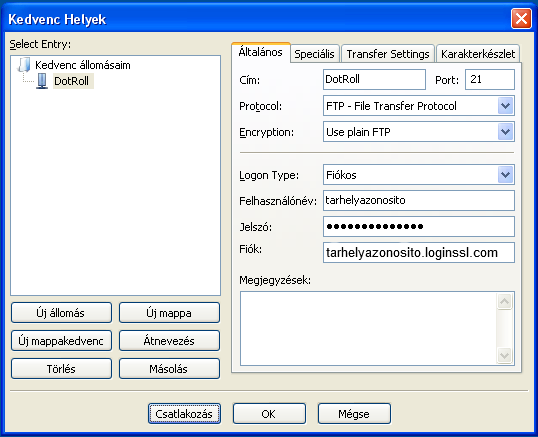
Then name the conection and enter the following information:
- **Address:** hostingID.loginssl.com
- **Port:** Here you need to enter the port number of the SFTP protocol, which is shown in Figure 22
- **Protocol:** Select SFTP – SSH File Transfer Protocol here
- **Logon Type:** Here you must select the Interactive option
- **User name:** Your hostingID
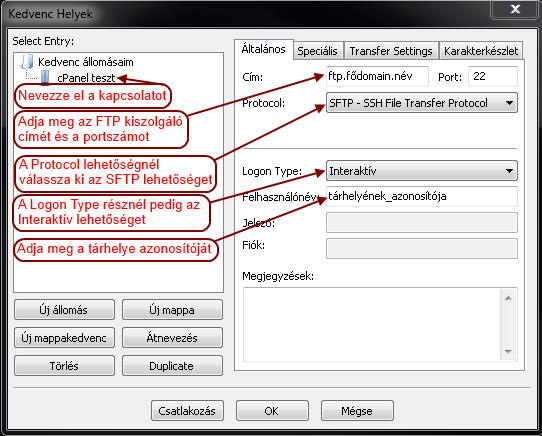
Enter connection data
#### CONNECTING
As a last step, click Connect.
# How to Use FTP with WinSCP
The data given in the picture is an illustration! You can find your actual settings in the administration interface!
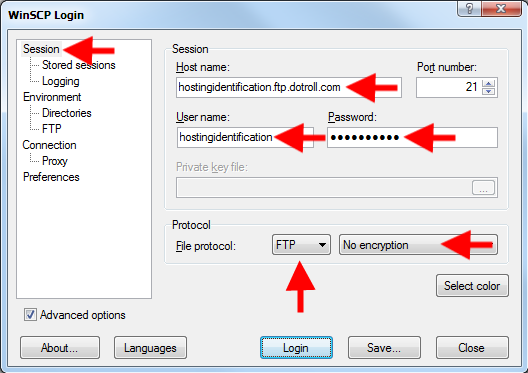
WinSCP is a free, open source FTP/SFTP/SCP client, with support for multiple encryption schemes.
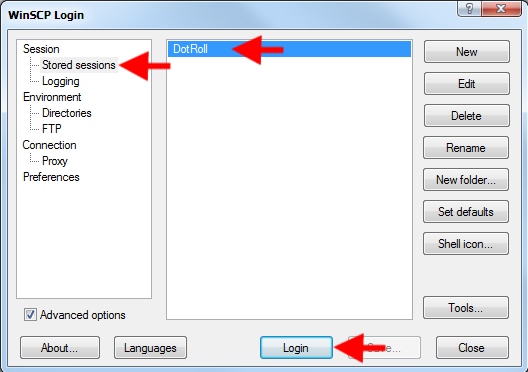
- After starting the application, click „Session”
- Choose FTP as your file protocol
- **Host name:** hostingID.loginssl.com
- **User name:** the FTP user name created or the hostingID
- **Password:** enter your password
- [winscp.net](http://winscp.net/ "http://winscp.net/")
The data given in the picture is an illustration! You can find your actual settings in the administration interface!
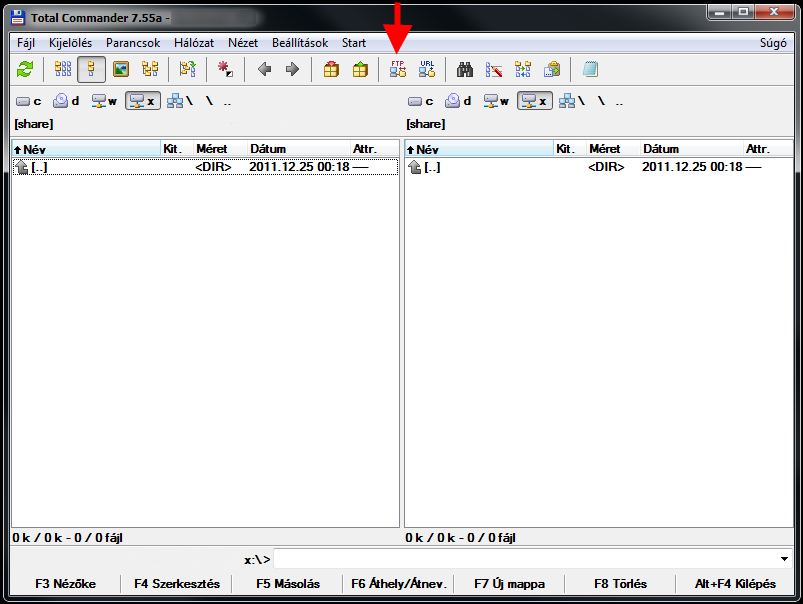
Total Commander is an easy to use file manager with FTP support.
Launch Total Commandert, then click the FTP entry in the Network menu or simply click the FTP button.
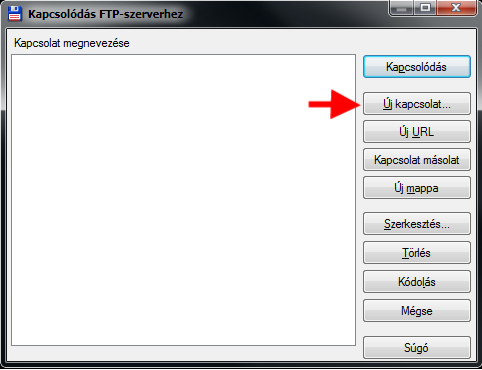
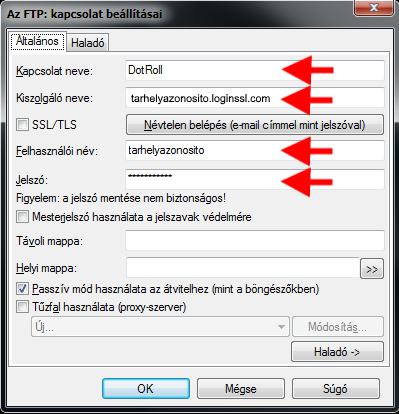
- **Connection name:** szabadon választott
- **Server name:** hostingID.loginssl.com
- **User name:** the created FTP user name or the hostingID
- **Password:** your password
- [www.ghisler.com](https://www.ghisler.com/ "http://www.totalcommander.hu")
The data given in the picture is an illustration! You can find your actual settings in the administration interface!
Full-featured FTP program, free. It supports firewall, custom commands, queuing multiple files, etc.
After starting the program, click on “File -> Favorite Places ..”. Here we can add a new FTP connection.
Click the “New Station” button. You can enter the name of the station.
- **Address:** cpanelusername.loginssl.com
- **Port:** 21
- **Server Type:** FTP – File Transfer Protocol
- **Logon Type:** Normal
- **Username:** Your cPanel login name
- **Password:** Your cPanel password
- [filezilla-project.org](https://filezilla-project.org/ "http://filezilla-project.org/")
For technical reasons, free hosting can only be used if you use DotRoll Ltd. name servers.
#### SET THE FTP PASSWORD
1. Log in to the page, then click **Domains** in the top menu bar
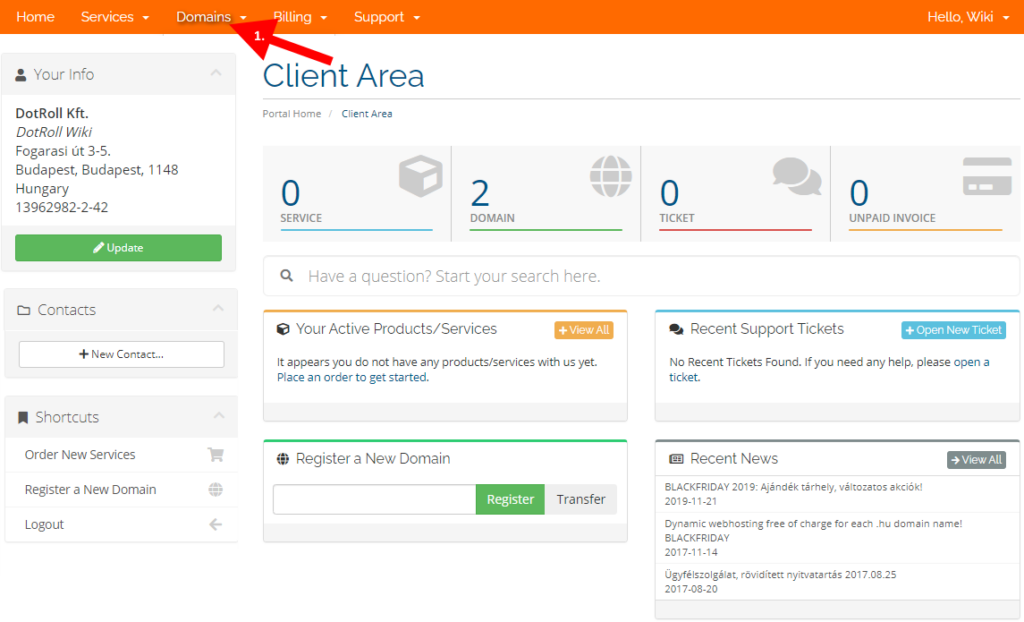
Domains menu
2. Select the **My Domains** submenu from the drop-down menu
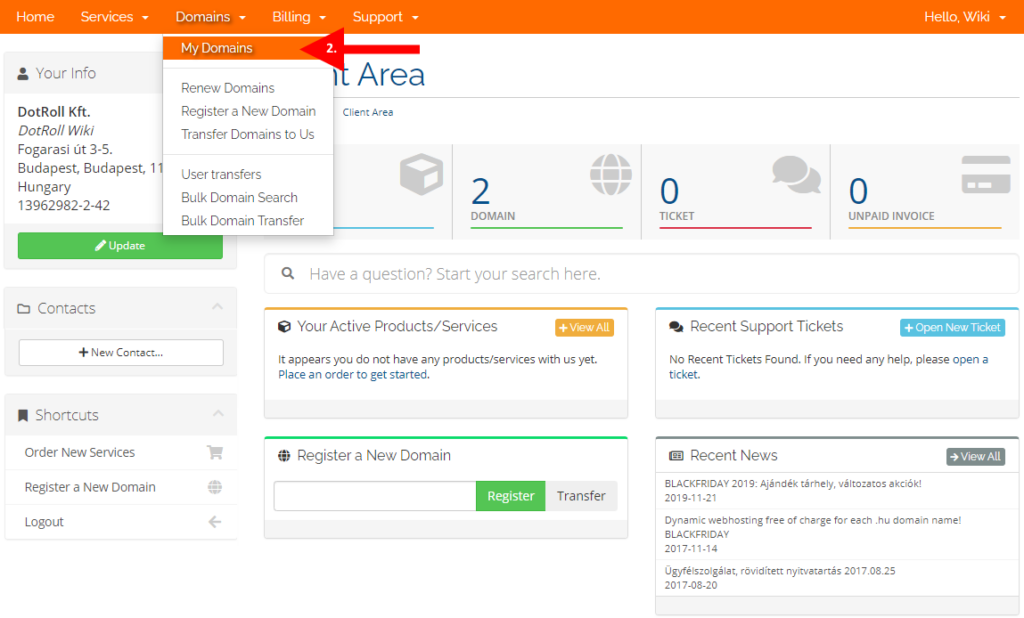
My Domains sub menu
3. Then click the wrench icon at the end of the line.
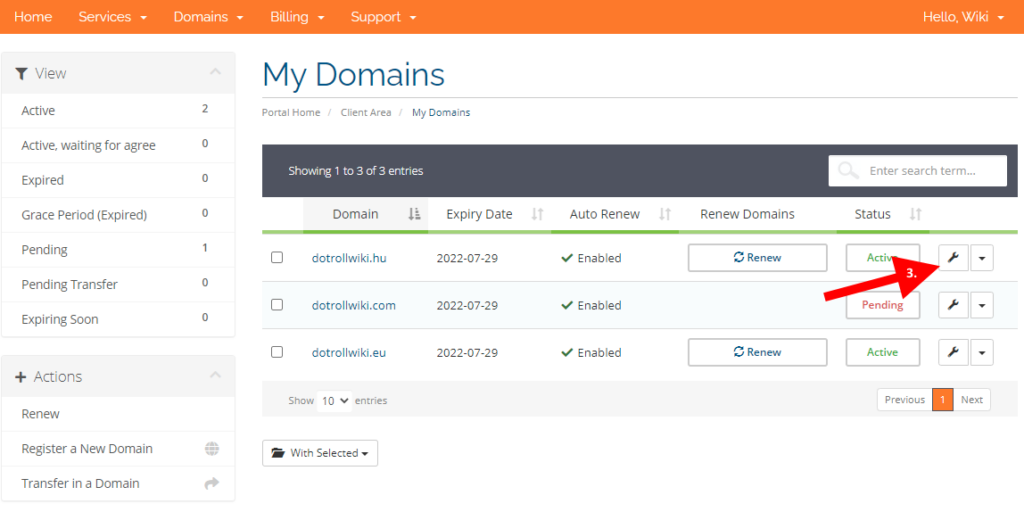
Wrench icon
4. In the **Manage** box at the top left of the page, click **Free Hosting** option
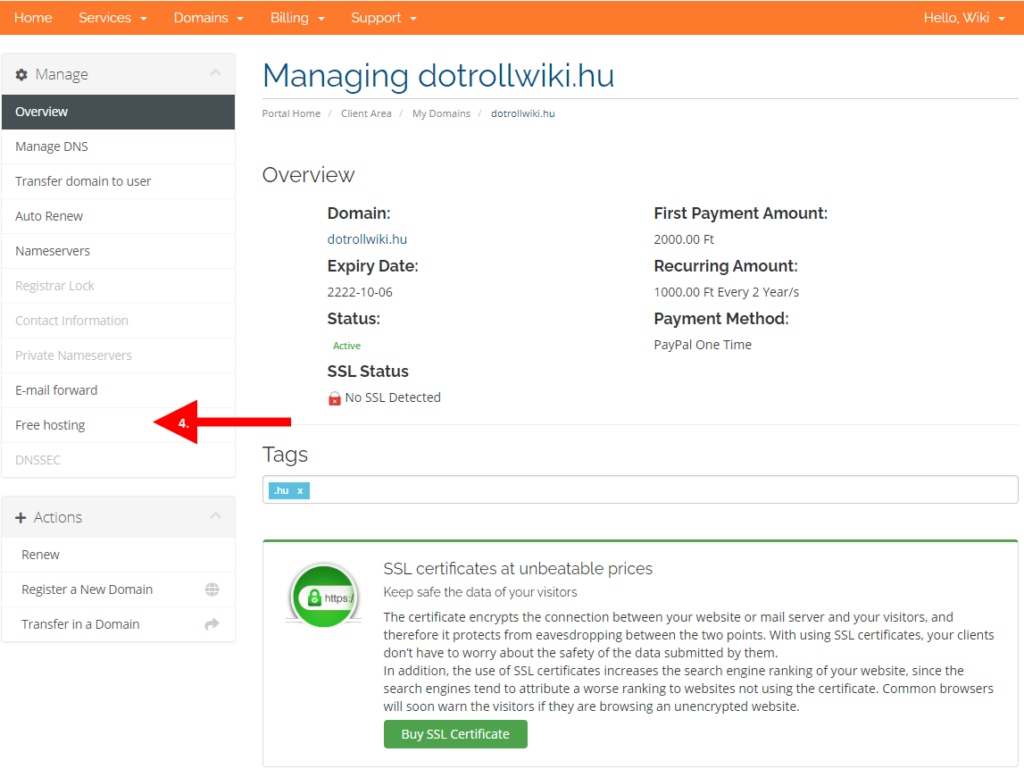
Select Free hosting option
5. On the page that appears, enter:
- the password for the FTP user
- repeat the password
- Select the checkbox next to **I have read and agree to the Terms of Service.**
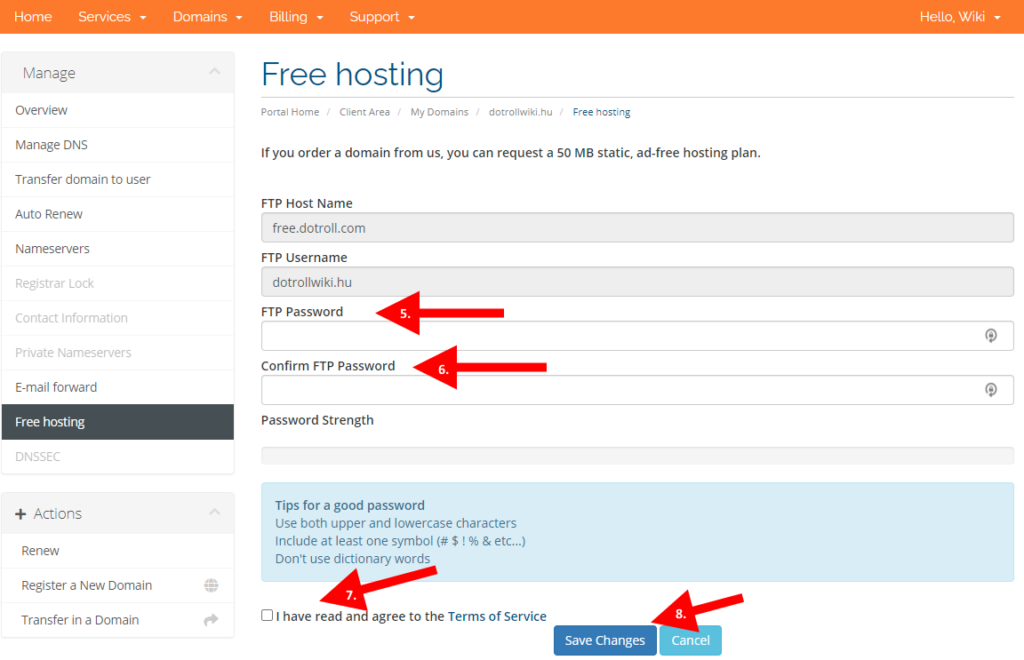
Type password
6. Finally, click the save button.
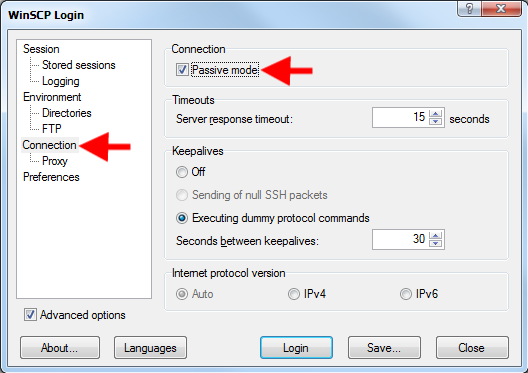
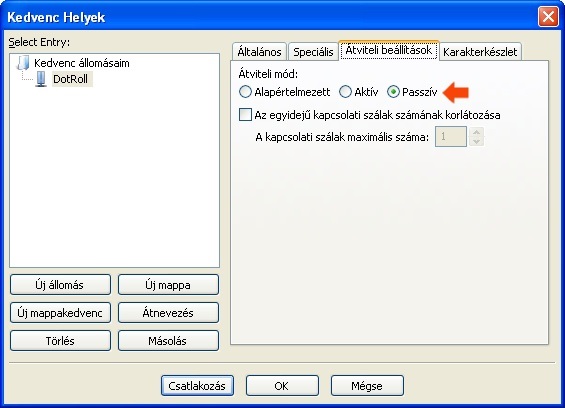
To avoid possible connection problems, we recommend that you use the FTP client program to connect to the server in passive mode.
##### SUPPORTED FTP CLIENT PROGRAMS:
- Total Commander
- FileZilla
- FireFTP
1. To change your DNS settings, click **Manage DNS** in the **Manage** box on the domain name data sheet.
2. On the page that appears, find the plain **Park** record for the domain name and click **Delete**, in case you want your domain name to display the same content with and without the www prefix, then click the **Delete** button for the **Park** record starting with \*.

Select Manage DNS option
3. Then double-click the **Add** button in the lower right corner of the page
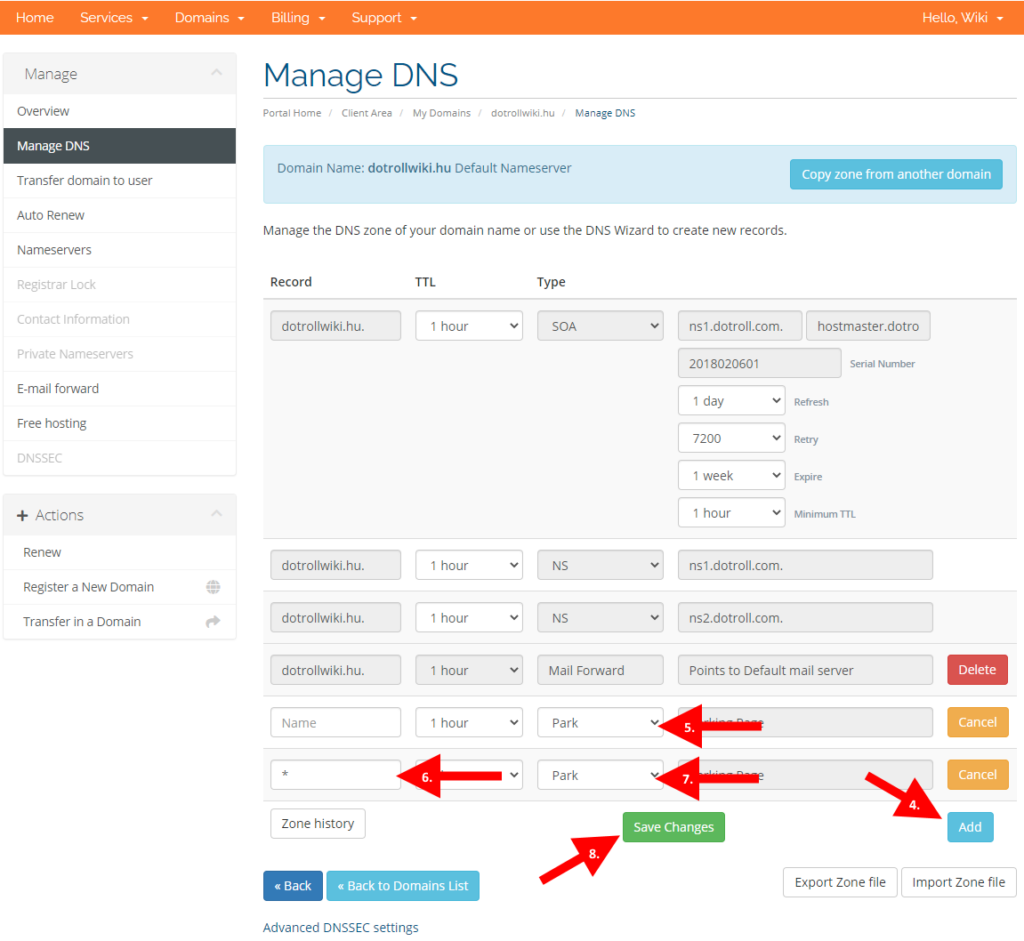
Edit the DNS zone
4. Select **Freeweb** from the drop-down list in the third column.
5. In the first field on the bottom row, enter the \* prefix, and in the third column, select **Freeweb**.
6. Finally, use the **Save Changes** button to save the configuration.
Because the previously specified settings in the zone file for the domain name have changed, it must be updated. This refresh time usually takes 1-4 hours so during this period, calling the domain name in your browser may not display the uploaded content.
# How to Fix the “Illegal PORT Command” FTP Error
If you are behind a router (NAT) or firewall while using [FTP](https://dotroll.com/en/knowledge-base/books/ftp "FTP"), you must enable passive mode in your FTP client.
# What Is FTPS and How Does It Work?
If you are behind a router (NAT) or firewall while using [FTP](https://dotroll.com/en/knowledge-base/books/ftp "FTP"), you must enable passive mode in your FTP client.
# What Is FTP and How Does It Work?
FTP (File Transfer Protocol) is a protocol for copying files to remote sites. Due to the fact, that it was born in the early years of the internet, no encryption was implemented. To remedy the situation, [FTPS](https://dotroll.com/en/knowledge-base/books/ftp/page/what-is-ftps-and-how-does-it-work "FTPS") was invented.
FTP has two modes of operation: active and passive. Active means, that the server connects back to the client to transfer data. This is only possible, if the client is not behind a firewall / NAT router. Most home / company sites are protected by such devices, so use of passive mode is recommended.
Below are some third-party clients, without the need for completeness
#### WINDOWS
- [Total Commander](https://dotroll.com/en/knowledge-base/books/ftp/page/how-to-use-ftp-with-total-commander)
- [WinSCP](https://dotroll.com/en/knowledge-base/books/ftp/page/how-to-use-ftp-with-winscp)
- [Filezilla](https://admin.dotroll.com/knowledgebase/98/using-ftp-with-filezilla.html?swcfpc=1)
- [FireFTP](https://dotroll.com/en/knowledge-base/books/ftp/page/how-to-set-up-the-filezilla-ftp-client)
- Cyberduck
- CrossFTP
- FlashFXP
- CuteFTP
#### MAC OS X
- Yummy
- [Filezilla](https://dotroll.com/en/knowledge-base/books/ftp/page/how-to-set-up-the-filezilla-ftp-client)
- FireFTP
- Cyberduck
- CrossFTP
- Fetch
- Transmit
- Captain FTP
#### UNIX/LINUX
- Konqueror KDE
- FTP Natutilus (GMONE)
- Filezilla
- CrossFTP
- gFTP
- FtpCube
- FireFTP
- Midnight Commander
You can find a comparison of FTP clients [here](https://en.wikipedia.org/wiki/Comparison_of_FTP_client_software).
#### SEE MORE
- FTPS
- Illegal PORT command
# How to Create and Edit Files via FTP
The easiest way is to use [FTP client](https://dotroll.com/en/knowledge-base/books/ftp "FTP client") to create and modify files on your storage. This method is much simpler than creating and editing command line files. Any FTP client program can be used, however, in this document, we will present the filezilla client as duplicate and modify the files. The program can be downloaded from the following link:
[Download Filezilla](https://filezilla-project.org/download.php "Download Filezilla")
Of course, you can create a file using cPanel’s built-in file manager or SSH, and you can access the related descriptions through the following links:
- [Creating and editing a file via cPanel internal File Manager](https://dotroll.com/en/knowledge-base/books/cpanel/page/how-to-create-and-edit-files-using-cpanel-file-manager "Creating and editing a file via cPanel internal File Manager")
- [Creating and editing a file via SSH](https://dotroll.com/en/knowledge-base/books/other/page/how-to-create-and-edit-files-via-ssh "Creating and editing a file via SSH")
The following description is just an example of how to create or modify a file using an FTP client. Following the description, make sure you create the file at the right place. If you modify it, edit the file you want.
#### CREATE A FILE
You can create a file using the steps below:
1. To connect to the server, see the description of the use of FTP clients.
2. Make sure that clines is turned on to show hidden files
3. After you have successfully logged in, make sure you are in the directory where you want to create the file. You can see it at the right of the file manager in the “Remote Directory” section. In the example, the remote directory is **/home/example\_user/exampledomain.com**
4. Right-click and select Create a new file
5. In the popup window that appears, enter the file name. In this example, the file is named **.htaccess**. Then click **OK**.
6. Then the empty file created on the server becomes visible.
1. To connect to the server, see the description of the use of FTP clients.
2. Make sure that clines is turned on to show hidden files
3. After you have successfully logged in, make sure you are in the directory where you want to create the file. You can see it at the right of the file manager in the “Remote Directory” section. In the example, the remote directory is **/home/example\_user/exampledomain.com**
4. Right-click on that file and select **Edit**
5. In the popup window that appears, you can select the text editor. You can specify an already installed text editor, but you can also use the default for Notepad for Windows.
6. After Notepad has loaded the file, make the necessary changes, then save the file with **File** / **Save** and close the Notepad application.
7. After a few seconds, a warning will alert you to a change in the file and offer the upload. Select **Yes** here.