If you want to use the mail.yourdomain.tld server in the description, replace it with your own domain name.
If you want to use the hostingID.loginssl.com server, enter your cPanel username instead of hostingID.
#### ADD A MAILBOX
The first time you start Outlook Mail, you’ll need to create a profile and enter your information.
If you are not starting Outlook for the first time, you need to click the **Tools** menu, **Account Settings**, and then click **New** on the **Email** tab in the window that appears.
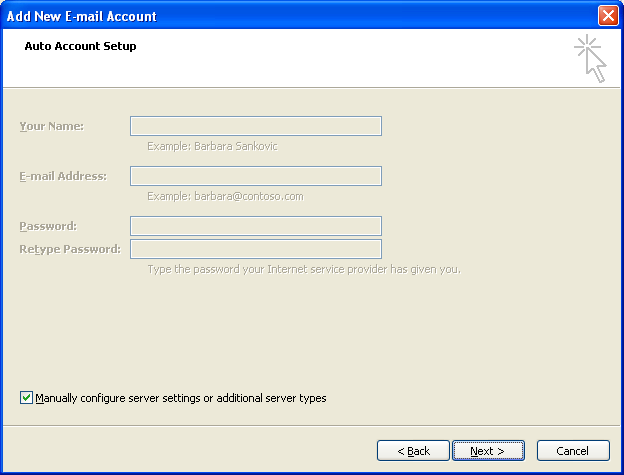
As a first step, select **Manually configure server settings or additional server types**, and then click **Next**.

1. After logging in, click Services / My Services in the Top menu bar.
2. On the page that appears, click the Active button at the end of the hosting service line for that domain name.
3. In the middle of the page, under the Hosting Information tab, you will find the cPanel user name.
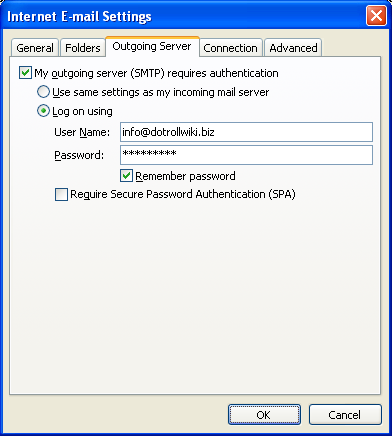
Do not select the **Log on using Secure Password Authentication(SPA)** option in the window.
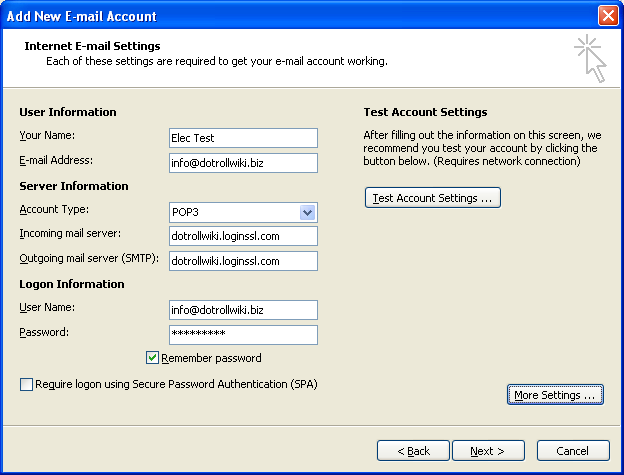
After entering the information, click the **More settings…** button.
Do not select the **Log on using Secure Password Authentication(SPA)** option in the window.
After selecting, click the **Properties** button.