# How to Set Up Email in Mac Mail

Create a mailbox! ([How to create E-mailbox in cPanel?](https://dotroll.com/en/knowledge-base/books/e-mail/page/how-to-create-an-email-account-in-cpanel))

After creating the mailbox, in the cPanel interface, under **Email Accounts** in the **Mail** box, scroll down to **Email Accounts** and click **Set Up Mail Client**. cPanel will display the information required for setup.

If you want to use the mail.yourdomain.tld server in the description, replace it with your own domain name.

If you want to use the hostingID.loginssl.com server, enter your cPanel username instead of hostingID.

#### SETTING MAILBOX IN FIRST TIME START

Start the **Mail** app, if you have not set up a mailbox previously, then the mailbox setup option will be displayed.

<div class="wpb_text_column wpb_content_element " id="bkmrk-"><div class="wpb_wrapper"><div class="wp-caption alignnone">![Choose a Mail account provider...](https://dotroll.com/wp-content/uploads/2020/08/iMail00-1-300x203.png)</div></div></div>Choose a Mail account provider…

<div class="wpb_text_column wpb_content_element " id="bkmrk--1"><div class="wpb_wrapper"><div class="wp-caption alignnone" id="bkmrk--2"></div></div></div>As first step check **Other Mail Account…** option, then click on **Continue** button.

<div class="wpb_text_column wpb_content_element " id="bkmrk--3"><div class="wpb_wrapper"><div class="wp-caption alignnone">![Other Mail Account...](https://dotroll.com/wp-content/uploads/2020/08/iMail01-1.png)</div></div></div>Other Mail Account…

<div class="wpb_text_column wpb_content_element " id="bkmrk--4"><div class="wpb_wrapper"><div class="wp-caption alignnone" id="bkmrk--5"></div></div></div>In the next window, enter your name, you can write anything here, but it’s a good idea to provide an ID and a name that will allow those who send you a letter to identify you. So this name will be sent as the sender name to those who receive you email. You will then need to enter the email address as well as the password set for that mailbox that you created on cPanel.

<div class="wpb_text_column wpb_content_element " id="bkmrk--6"><div class="wpb_wrapper"><div class="wp-caption alignnone">![Add a Mail account](https://dotroll.com/wp-content/uploads/2020/08/iMail03-1.png)</div></div></div>Add a Mail account

<div class="wpb_text_column wpb_content_element " id="bkmrk--7"><div class="wpb_wrapper"><div class="wp-caption alignnone" id="bkmrk--8"></div></div></div>After that click on **Sign In** button. The mail client attempts to connect to the mailbox based on the data provided, if it does not succeed, the following window will appear:

<div class="wpb_text_column wpb_content_element " id="bkmrk--9"><div class="wpb_wrapper"><div class="wp-caption alignnone">![Sign in](https://dotroll.com/wp-content/uploads/2020/08/iMail04-1.png)</div></div></div>Sign in

<div class="wpb_text_column wpb_content_element " id="bkmrk--10"><div class="wpb_wrapper"><div class="wp-caption alignnone" id="bkmrk--11"></div></div></div>In the window **Incoming Mail Server:** and in **Outgoing Mail Server:** fields, enter the mail server that will be as follows:

**cpanelusername.loginssl.com**

In the image or above .loginssl.com, you’ll need to enter the user name for the cPanel interface. You can look for The cPanel login name at [https://admin.dotroll.com](https://admin.dotroll.com/?swcfpc=1) site as it follows:

<div class="wpb_text_column wpb_content_element " id="bkmrk-after-logging-in%2C-cl"><div class="wpb_wrapper">1. After logging in, click on the Services / My Services menu in the top menu bar.
2. On the page that appears, click on the Active button at the end of the hosting service line which belongs to the domain name.
3. In the middle of the page, you can find the cPanel username under the Hosting Information tab.

</div></div>Once you have entered the data, click again on **Sign In** button.

<div class="wpb_text_column wpb_content_element " id="bkmrk--12"><div class="wpb_wrapper"><div class="wp-caption alignnone">![Select the apps you want to use with this account:](https://dotroll.com/wp-content/uploads/2020/08/iMail05-1.png)</div></div></div>Select the apps you want to use with this account:

<div class="wpb_text_column wpb_content_element " id="bkmrk--13"><div class="wpb_wrapper"><div class="wp-caption alignnone" id="bkmrk--14"></div></div></div>As a final step, click on **Done** button.

<a name="adding_existing"></a>

#### ADD A SECOND MAILBOX

The settings for the set mailbox are located within Mail app, in the **Mail** menu **Accounts…** menu. If a mailbox is already set up in your Mail app, you can set up a new account here:

<div class="wpb_text_column wpb_content_element " id="bkmrk--16"><div class="wpb_wrapper"><div class="wp-caption alignnone">![Mail / Accounts... menu](https://dotroll.com/wp-content/uploads/2020/08/iMail06-1.png)</div></div></div>Mail / Accounts… menu

<div class="wpb_text_column wpb_content_element " id="bkmrk--17"><div class="wpb_wrapper"><div class="wp-caption alignnone" id="bkmrk--18"></div></div></div>On the appearing **Internet Accounts** window, you can find a **+** mark at the lower left corner of the window, with this you can add a new mailbox to the **Mail** client or modify some of the existing accounts.

<div class="wpb_text_column wpb_content_element " id="bkmrk--19"><div class="wpb_wrapper"><div class="wp-caption alignnone">![Internet Accounts](https://dotroll.com/wp-content/uploads/2020/08/iMail07-1.png)</div></div></div>Internet Accounts

<div class="wpb_text_column wpb_content_element " id="bkmrk--20"><div class="wpb_wrapper"><div class="wp-caption alignnone" id="bkmrk--21"></div></div></div>If you click on an existing account you will have the option to:

<div class="wpb_text_column wpb_content_element " id="bkmrk-to-change-the-mailbo"><div class="wpb_wrapper">- 
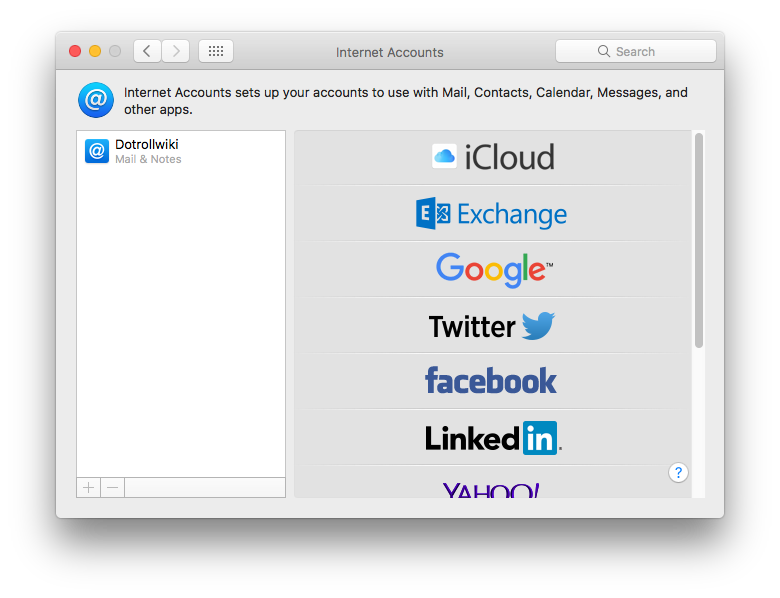
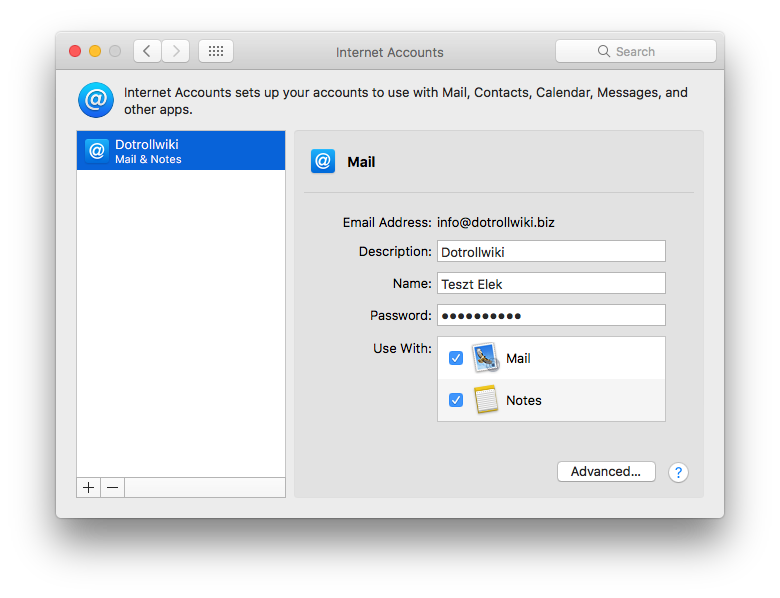
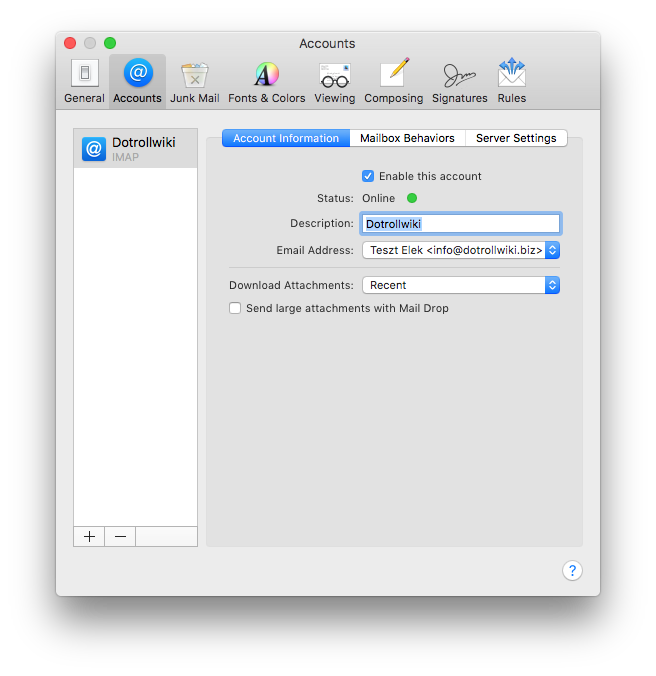
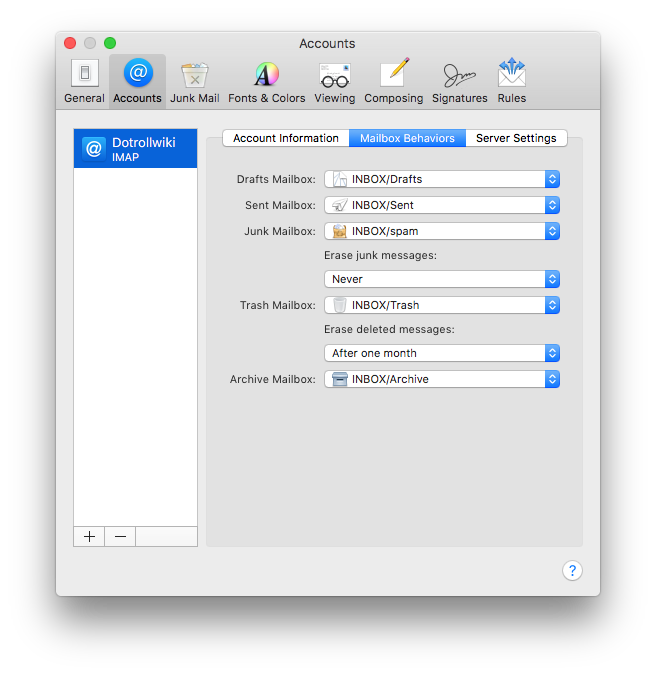
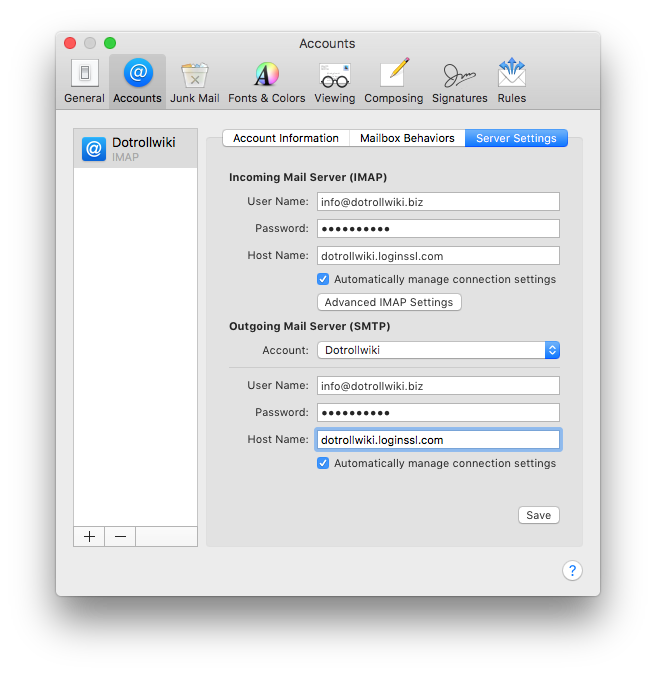
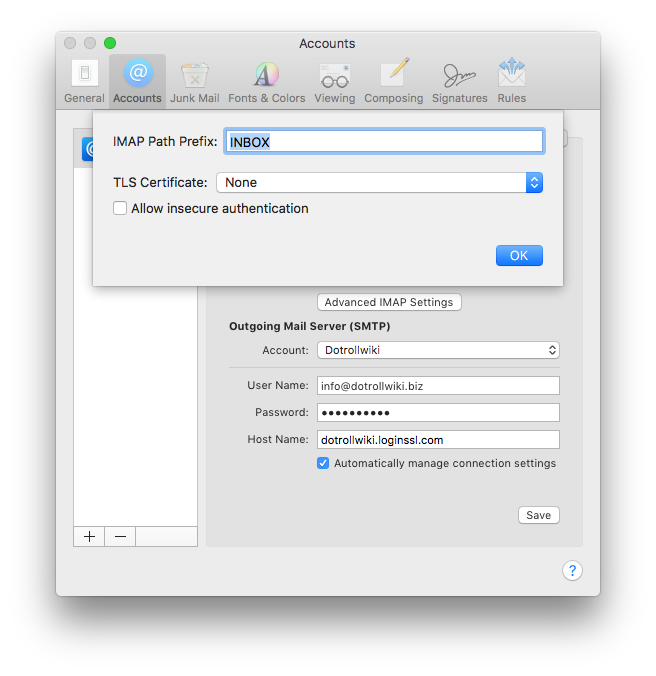
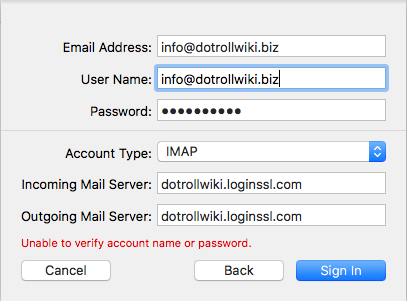
to change the mailbox name within Mail app
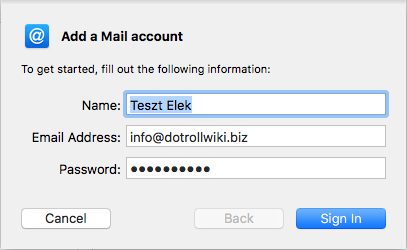
- to change the name displayed at the sender name
- to change the sender’s email address
- to change the password for the mailbox

<div class="wp-caption alignnone">![Internet Accounts - Mail setup](https://dotroll.com/wp-content/uploads/2020/08/iMail08-1.png)</div></div></div>Internet Accounts – Mail setup

<div class="wpb_text_column wpb_content_element " id="bkmrk--22"><div class="wpb_wrapper"><div class="wp-caption alignnone" id="bkmrk--23"></div></div></div>Click on **Advanced …** button to modify the incoming mail server.

<div class="wpb_text_column wpb_content_element " id="bkmrk--24"><div class="wpb_wrapper"><div class="wp-caption alignnone">![Internet Accounts - Mail setup - Advanced...](https://dotroll.com/wp-content/uploads/2020/08/iMail09-1.png)</div></div></div>Internet Accounts – Mail setup – Advanced…

<div class="wpb_text_column wpb_content_element " id="bkmrk--25"><div class="wpb_wrapper"><div class="wp-caption alignnone" id="bkmrk--26"></div></div></div>By clicking Mail in the Mail app, you can click on **Preferences …** to customize your mailbox.

<div class="wpb_text_column wpb_content_element " id="bkmrk--27"><div class="wpb_wrapper"><div class="wp-caption alignnone">![Mail / Prefetences... menu](https://dotroll.com/wp-content/uploads/2020/08/iMail10-1.png)</div></div></div>Mail / Prefetences… menu

<div class="wpb_text_column wpb_content_element " id="bkmrk--28"><div class="wpb_wrapper"><div class="wp-caption alignnone" id="bkmrk--29"></div></div></div><div class="wpb_text_column wpb_content_element " id="bkmrk--30"><div class="wpb_wrapper"><div class="wp-caption alignnone">![Accounts popup](https://dotroll.com/wp-content/uploads/2020/08/iMail11-1.png)</div></div></div>Accounts popup

<div class="wpb_text_column wpb_content_element " id="bkmrk--31"><div class="wpb_wrapper"><div class="wp-caption alignnone" id="bkmrk--32"></div></div></div>You can enable or disable that mailbox, which is useful if your account is set up on multiple devices, but a password has been changed for that account.

<div class="wpb_text_column wpb_content_element " id="bkmrk--33"><div class="wpb_wrapper"><div class="wp-caption alignnone">![Mail Behaviors](https://dotroll.com/wp-content/uploads/2020/08/iMail12-1.png)</div></div></div>Mail Behaviors

<div class="wpb_text_column wpb_content_element " id="bkmrk--34"><div class="wpb_wrapper"><div class="wp-caption alignnone" id="bkmrk--35"></div></div></div>You can specify which folders the client should use in the mailbox.

<div class="wpb_text_column wpb_content_element " id="bkmrk--36"><div class="wpb_wrapper"><div class="wp-caption alignnone">![Server settings](https://dotroll.com/wp-content/uploads/2020/08/iMail13.png)</div></div></div>Server settings

<div class="wpb_text_column wpb_content_element " id="bkmrk--37"><div class="wpb_wrapper"><div class="wp-caption alignnone" id="bkmrk--38"></div></div></div>On the Server Settings tab, you can change the incoming and outgoing mail server settings.

<div class="wpb_text_column wpb_content_element " id="bkmrk--39"><div class="wpb_wrapper"><div class="wp-caption alignnone">![IMAP path prefix](https://dotroll.com/wp-content/uploads/2020/08/iMail14-1.png)</div></div></div>IMAP Path Prefix

<div class="wpb_text_column wpb_content_element " id="bkmrk--40"><div class="wpb_wrapper"><div class="wp-caption alignnone" id="bkmrk--41"></div></div></div>