# DirectAdmin
# How to create a backup on DirectAdmin hosting
### **CREATE BACKUP**
1.Sign in at **[https://admin.dotroll.com/](https://admin.dotroll.com/?swcfpc=1)** with your username and password!
2.Click the Services / My Services menu at the top menubar!
3.From your services, click DirectAdmin web hosting.
4.Then you can see the most important data of your hosting and a few options will be available by scrolling down, here click the **Backup** option!
5.Click the **“Create Backup”** button, then in the pop-up window, you can turn the different options for what to back up, as you can see in the picture.
The **Domain Directory** option contains all domains that we added to the hosting. It’s important that the e-mail account, e-mail data and e-mail settings are separate, so you must pay attention to what you save.
6.After selecting the options, click the Create button, and the creation of the backup started.
7.If the backup is complete, you can see it in the list, if not, you have to refresh the page!
### **RESTORE BACKUP**
1.Sign in at **[https://admin.dotroll.com/](https://admin.dotroll.com/?swcfpc=1)** with your username and password!
2.Click the Services / My Services menu at the top menubar!
3.From your services, click DirectAdmin web hosting.
4.Then you can see the most important data of your hosting and a few options will be available by scrolling down, here click the **Backup** option!
5.If you want to restore a backup, click the Restore icons next to the name of the chosen backup!
When you restore a backup, the data to be restored completely overwrites the existing data, think carefully about, what you saved and what you want to overwrite!
# How to Add a Domain Name to DirectAdmin Hosting
1. Sign in at **[https://admin.dotroll.com/](https://admin.dotroll.com/?swcfpc=1)** with your username and password!
2. In the top menubar, click the **Services / My Services** menu!
3. From your services, click the DirectAdmin web hosting!
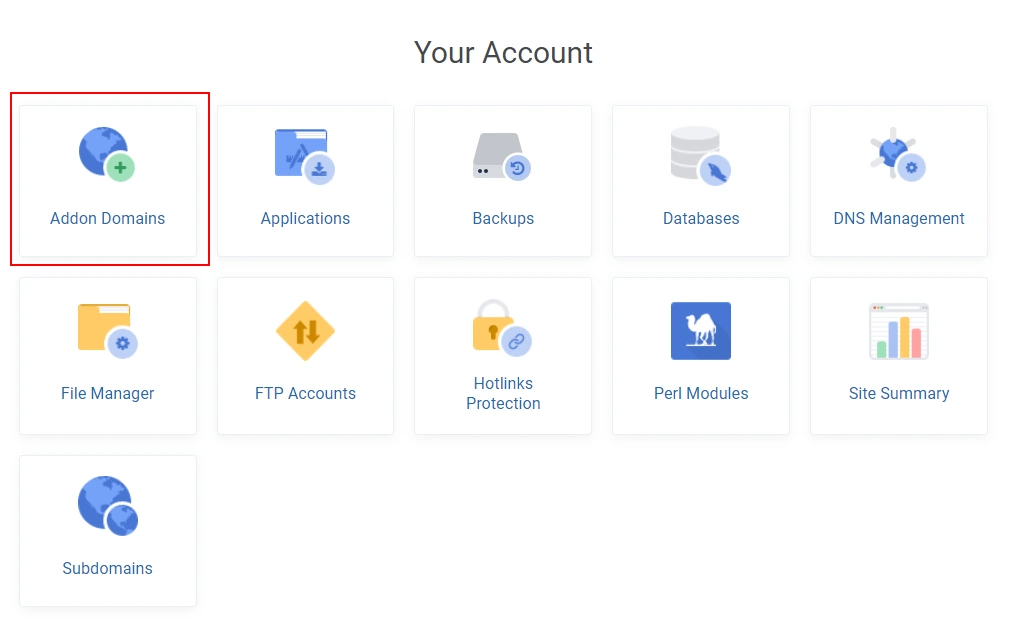
4. Then you can see the most important data of your hosting and a few options will be available by scrolling down, here click the **Addon Domains** option!
5. Next, click **Create Addon Domains** button!
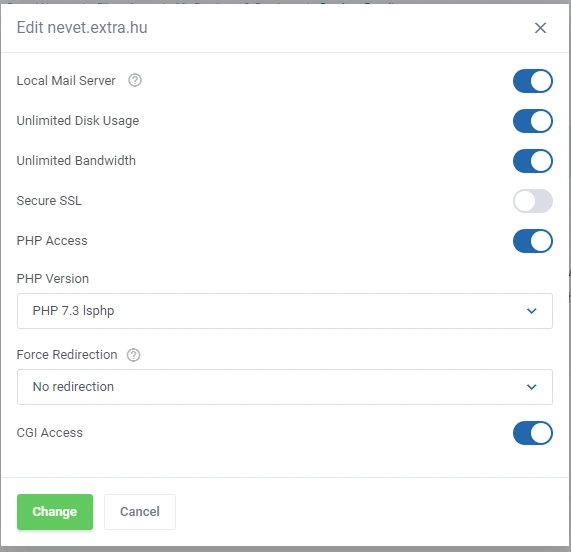
6. The pop-up window below will appear, enter the domain name in the **Domain name** field. Default settings are **unlimited bandwidth and unlimited disk space**, this means that the domain name can use unlimited bandwidth and disk space up to the size of the storage space. If you change it, you can set a custom measure. **PHP access** should be set if the website is based on PHP, if it is static, it isn’t absolutely necessary. If the **local mail server** is checked, emails will be sent from the same server.
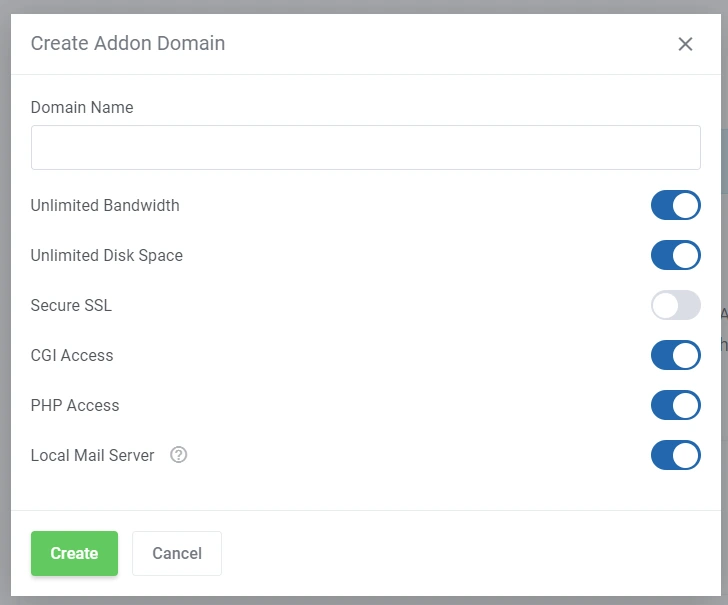
7. After the settings, click the **Create** button!
8. After that, the registered domain name appears and there are some icons next to the domain name.
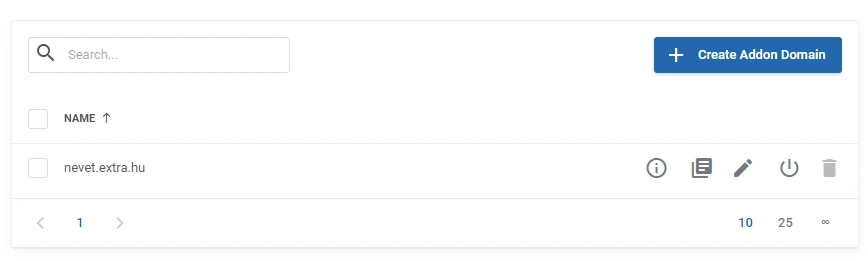
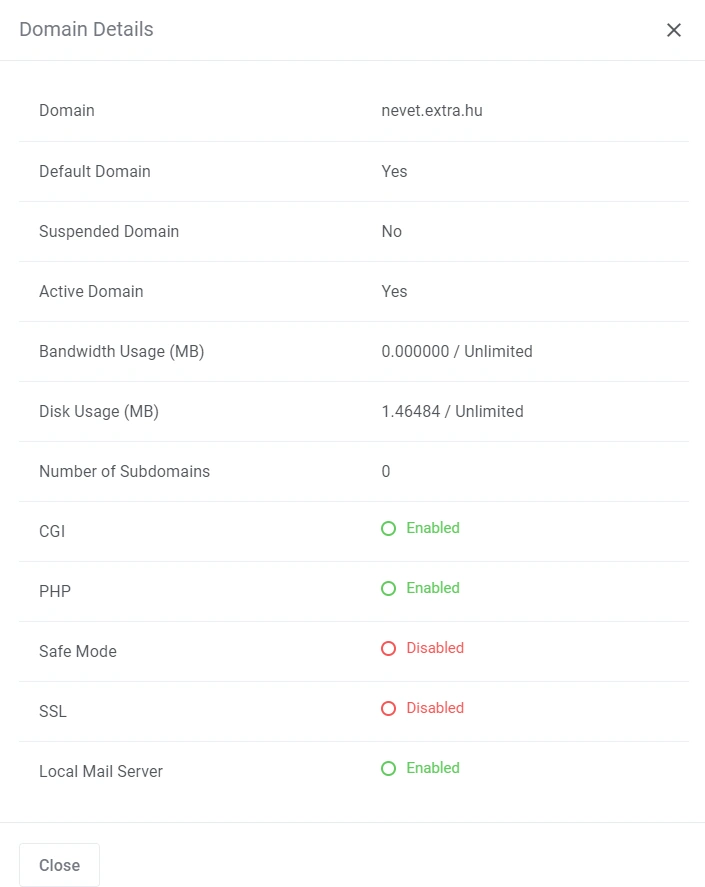
9. The first is the **“Show Domain Details”**, where we can see the already set information.
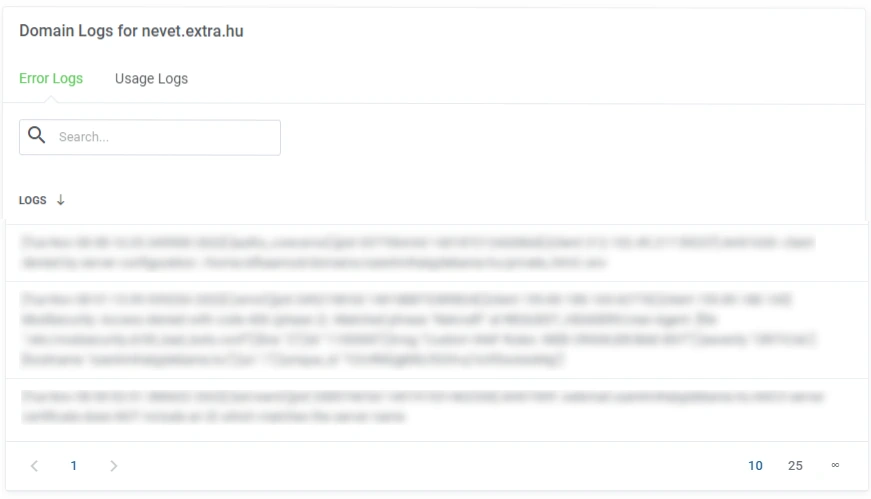
10. The second icon is the **“Show Domain Logs”,** here you can see the Error and Usage Logs.
11. The third icon is the **Edit**, where the same panel will appear when adding a domain name, with the difference that we can set the PHP version. DirectAdmin hosting is created with the native PHP version by default, in case you want to change the current PHP version you can do so by logging into the DirectAdmin interface and selecting the **Change PHP version** menu item in the **Extra functions.
**
12. The fourth icon is a disabled icon, which **we can suspend the domain name.**
13. The last icon is the trash icon, here **we can delete the addon domain names.**
# How to use lsPHP on my DirectAdmin webspace
#### WHAT IS LSPHP?
lsphp – PHP + LSAPI.
#### WHAT IS LSAPI?
LiteSpeed Server Application Programming Interface (LSAPI) is designed specifically for seamless, optimized communication between LiteSpeed Web Server and third party web applications. The lsapi is the fastest and most reliable way to serve PHP pages. It has a low memory footprint and understands PHP directives from .htaccess files.
If you don’t want to use the default PHP version under on your domain name, you need to create a .htaccess file in a particular domain name assigned to a folder (document\_root) will be placed into one of the following lines. After setting recursively, all sub-directories will be applied to the setting.
PHP version 4.4:
```
AddHandler application/x-httpd-lsphp44 .php .php5 .php4 .php3
```
PHP version 5.1:
```
AddHandler application/x-httpd-lsphp51 .php .php5
```
PHP version 5.2:
```
AddHandler application/x-httpd-lsphp52 .php .php5
```
PHP version 5.3:
```
AddHandler application/x-httpd-lsphp53 .php .php5
```
PHP version 5.4:
```
AddHandler application/x-httpd-lsphp54 .php .php5
```
PHP version 5.5:
```
AddHandler application/x-httpd-lsphp55 .php .php5
```
PHP version 5.6:
```
AddHandler application/x-httpd-lsphp56 .php .php5
```
PHP version 7.0:
```
```
AddHandler application/x-httpd-
```lsphp70 .php .php5
```
PHP version 7.1:
```
AddHandler application/x-httpd-lsphp71 .php .php5
```
PHP version 7.2:
```
AddHandler application/x-httpd-lsphp72 .php .php5
```
PHP version 7.3:
```
AddHandler application/x-httpd-lsphp73 .php .php5
```
PHP version 7.4:
```
AddHandler application/x-httpd-lsphp74 .php .php5
```
PHP version 8.0:
```
AddHandler application/x-httpd-lsphp80 .php .php5
```
PHP version 8.1:
```
AddHandler application/x-httpd-lsphp81 .php .php5
```
The module enabled per PHP version is a global setting, but you can change your php.ini settings with a .php.ini file placement. Starting with PHP 5.4 version, you can put a .user.ini file, each of which can override PHP settings for that folder (and its subdirectories).