# How to Generate and Configure SSH Keys
The common way to connect to the server via SSH is to use a username and a password. But to increase security, you can use a pair of keys(a private one and a public one) to connect to the server.
The public key will be on the server. The private key will be on your computer. When you are trying to connect, the server compares the two keys. If they are the right ones, you will be able to access it.
We will show in this post how to generate the pair of keys and connect to your server with PuTTY.
To generate and use public and private keys in cPanel:
1. Log in to **cPanel s**croll down to the **SECURITY** section -> **SSH Acces**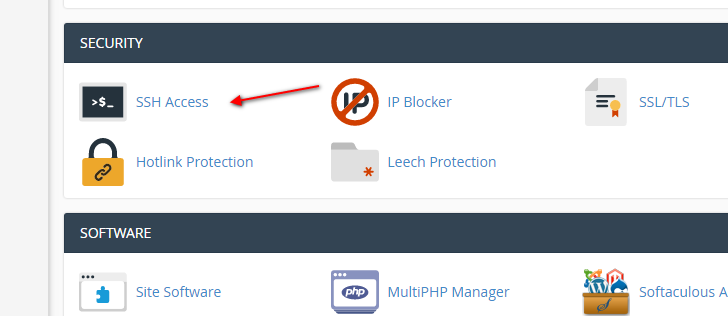
SSH Access
2. Click the **Manage SSH Keys** button 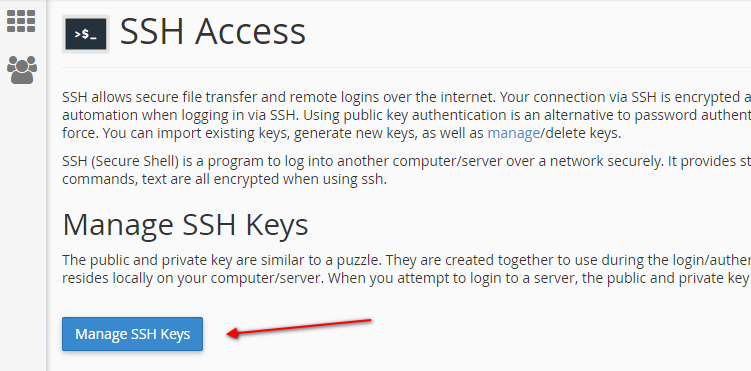
Manage SSH Keys
3. On the next page, you can create a new key or import an existing key. 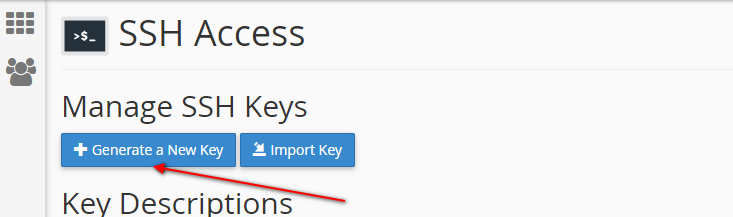
Generate a New Key or Import Key
4. Click the **Generate a New Key** button
5. On the next page, enter the name of the key and the password for the key.
- **Key Name** – you can leave the default value
- **Key Password** – enter the password for the key and confirm it
- **Key Type (RSA or DSA)** – let the default value
- **Key Size (2048 or 4096)** – let the default value 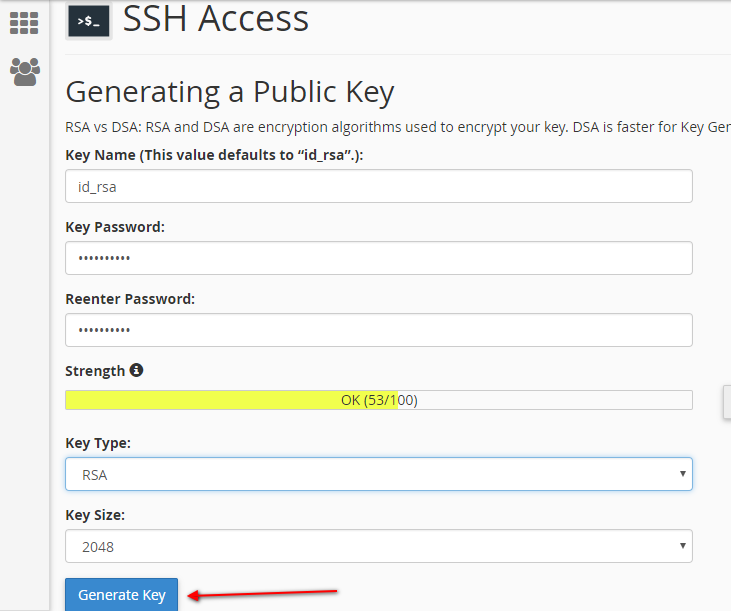
Generate new key
cPanel recommendations:
RSA vs DSA: RSA and DSA are encryption algorithms used to encrypt your key. DSA is faster for Key Generation and Signing and RSA is faster for Verification.
6. Click the **Generate Key** button. You will see a confirmation message: *Key Generation Complete!* with some details: ```
Generating public/private rsa key pair.
Enter passphrase (empty for no passphrase):
Enter same passphrase again:
Your identification has been saved in /home/username/.ssh/id_rsa.
Your public key has been saved in /home/username/.ssh/id_rsa.pub.
The key fingerprint is:
b7:9a:55:59:c1:a7:6a:31:5c:9a:40:50:e9:73:24:a0
```
7. Click the **Go Back** button
8. Now you need to authorize the public key. (the *Authorization Status* is *not authorized*). Click the **Manage** link 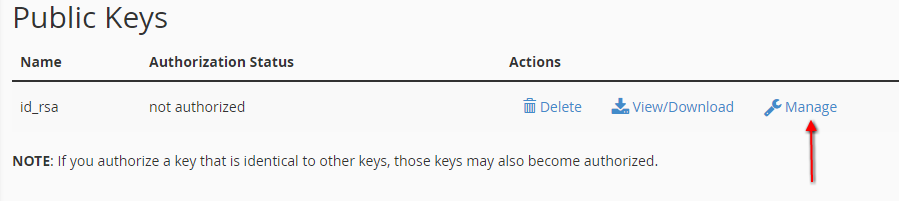
Manage Public keys
9. You will see a message *The key with the name “id\_rsa” is currently “not authorized” for use when connecting to this account.* Click the **Authorize** button. The success message is: *The key “id\_rsa.pub” has been authorized.*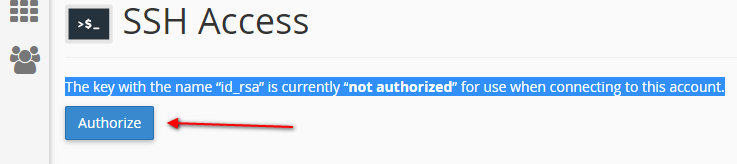
Authorize SSH key
10. Click the **Go Back** button
11. Go to the Private Keys sections and click the **View/Download** link. 
View or Download private SSH key
The key that appears on the page that appears can be saved in several formats:
- If you want to connect to the server via MAC or a LINUX distribution, copy the key from the box under **Open SSH Key *Keyname*** **Open Key** and paste it into a simple text editor (such as Notepad, Notepad ++). The last step is to save the file.
- convert the Private Key to PPK format 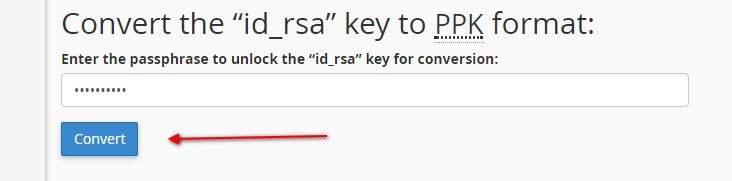
Convert private key to PuTTY PPK format
In case you want to connect to the server with PuTTY, you have to enter the password set for the key and click the **Convert** button.
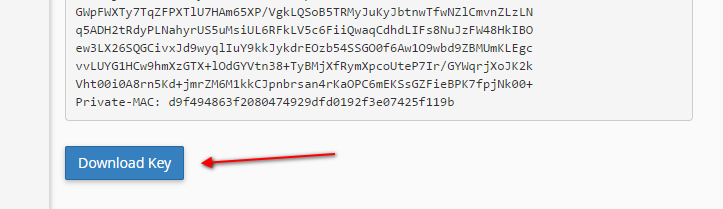
Download converted key
Copy the key from the box under **Private SSH Key *Keyname* Open Key** and paste it into a simple text editor (such as Notepad, Notepad ++). As a final step, specify the folder where you want to save the Private Key and name the key so that its extension is in .ppk format.